Reading view

There are new articles available, click to refresh the page.

The KitchenAid KF2 might be the company's entry-level automatic coffee machine, but I think its unique feature makes it the most desirable

KitchenAid KF2 two-minute review

The KitchenAid KF2 Fully Automatic Espresso Machine is the entry-level model in the company’s six-strong range of automatic coffee machines, and was launched in mid-2026 alongside the KF3 and KF4.

It adopts the exact same slim build as its two siblings, making any of them ideal for smaller kitchens. It also benefits from the exact same Intelligrind coffee bean grinder, which automatically determines the best grind size depending on the beans you’ve put in. The brewing unit is the same also, and in my taste tests, I couldn’t notice any obvious difference between the three. That means you’re going to get a wonderful, tasty espresso with each use.

What sets the KF2 apart — and where KitchenAid has made cuts to bring the cost down — is its feature set regarding drink presets and general usability. It’s also the only model in KitchenAid’s entire fully automatic coffee machine range to rock a steam wand for foaming milk — the others all use a hose-based system. While this may seem like a drop down in specification, I personally found the steam wand to perform the best when making foamy lattes and cappuccinos. What’s more, a steam wand is inherently going to perform better with non-dairy milk as it allows for greater control over temperature.

As with the KF3 and KF4, the KitchenAid KF2 is capable of making iced-coffee drinks, although as I found in my KitchenAid KF3 review, the results are a little underwhelming. This is because the brewed espresso is hot enough to quickly melt the ice in your cup or glass, despite KitchenAid claiming it’s brewed at a lower temperature.

Where the KitchenAid KF2 loses points slightly is the fact it doesn’t offer user profiles. I’ve been used to having profiles for some time at home, as I currently use the KitchenAid KF4 and have previously used the Philips LatteGo 4400, which offer four profiles and two profiles, respectively. Having them makes brewing a coffee incredibly quick and simple: just select a profile, select a drink and that’s it.

The fact the KF2 doesn’t have profiles means that brewing a variety of coffees will take longer, as you’ll have to select the drink and adjust any settings each time. It therefore might not be the best option for larger households, but for households of one or two people it’s still worthy of consideration.

The other slight niggle I have, which affects the KF3 and KF4 also, is that the unit can go through water relatively quickly due to it running a rinse cycle on start up and shutdown. The shutdown cycle I can understand, but I find the start-up cycle to be a little redundant.

All things considered, the KitchenAid KF2 Fully Automatic Espresso Machine is another fantastic option from the brand. It brews a well-extracted espresso each and every time and the steam wand works wonders for milk-based drinks.

KitchenAid KF2 review: Price & availability

  • Launched in UK and US April 2026, Australia in July 2026
  • List price $799.99 / £699 / AU$1,099

The KitchenAid KF2 Fully Automatic Espresso Machine launched in the US and UK in April 2026, before making its way to Australia in July 2026. It has a list price of $799.99 / £699 / AU$1,099, making it the company’s most affordable fully automatic machine.

The step-up KF3 adds a small color display to improve navigation and usability, four customizable profiles and a larger menu of drink presets, with a list price $999.99 / £749 / AU$1,349.

The top-tier model, the KF4 ($1,299.99 / £899 / AU$1,599) offers much of the same functionality as the KF2 with regard to grinder and brewing unit. It gains even more recipes, a large color touchscreen and KitchenAid’s hose-based milk-foaming system, complete with milk carafe.

I’m of the opinion that the KF2’s steam wand is the best option for expertly-frothed milk and for using with non-dairy milk varieties, instantly giving the machine a leg up over its siblings. And, since the actual coffee-brewing process is the same across all three machines, the KF2 represents excellent value.

That being said, the Ninja Luxe Cafe Premier offers more in the way of features, including a dedicated cold brew setting and cold-extraction for improved iced-coffee results, along with intelligent grind and dosage settings. Its list price is less than the KF2’s at $599.99 / £549.99 / AU$799.99, although it too doesn’t offer user profiles either and requires more hands-on input.

  • Value score: 4 / 5

KitchenAid KF2 review: Specifications

Name

KitchenAid KF2 Fully Automatic Espresso Machine

Type

Bean-to-cup

Dimensions (H x W x D)

14.2 x 7.7 x 18.5 inches / 361 x 196 x 470mm

Weight

19.8lbs / 9kg

Water reservoir capacity

1.9 quarts / 1.8 liters

Milk frother

Yes, Pannarello steam wand

Bars of pressure

15

Noise level

72dB grinding, 60dB brewing

User profiles

0

KitchenAid KF2 review: Design

  • Compact size will suit smaller space
  • Steam wand suits plant-based milks
  • No dishwasher-safe components

KitchenAid KF2

(Image credit: Future)

Of the three new compact automatic models, the KitchenAid KF2 sticks out the most for a couple of reasons. Firstly, it’s only available in a matte black finish (the KF3 and KF4 also come in Porcelain White, which I’m personally a fan of), and secondly there’s no color display.

The matte black finish is still sleek and smart-looking, it must be said, although there is a shiny, fingerprint-loving panel on the front at the top. You’ll want to keep a cloth nearby to keep it looking its best.

I don’t consider the lack of a color display to be a huge negative against the KF2, as the backlit panel is bright and clear when selecting a drink and adjusting settings. The color screens on the rest of KitchenAid’s espresso machine range do offer useful assistance with features like images of the drink you want to make, but it’s not something I missed when testing the KF2.

Physically the KitchenAid KF2 is the same as the other two compact models released in 2026, measuring 14.2 x 7.7 x 18.5 inches / 361 x 196 x 470mm (H x W x D). This compact form makes it easy to place the unit on a kitchen counter, and should be especially ideal for those with smaller kitchens. A couple of built-in wheels on the bottom at rear of the machine aid with manoeuvring into position.

Interacting with the KF2 is done via five buttons on the front panel. These select the drink type, dosage and strength — each of which can be pressed multiple times to cycle through options — one to activate cleaning cycles and a final button to initiate and cancel brewing. Each button press reveals a different backlit symbol on the front panel which are relatively self-explanatory.

Drink type cycles between espresso, coffee and over ice, dose lets you choose between one or two servings (either two cups under the dispenser or one for a double serving), and strength is a scale of one to three. This refers to how much coffee is ground into the brewing unit, from 7g (setting one) to 14g (setting three).

The bean hopper recessed into the top of the KF2 is large enough to hold 250g worth of coffee beans, which is accessed via a removable lid. While this does mean there’s no visual indication as to how many beans are left, it does at least mean the beans are kept airtight and away from light, helping to retain their freshness. There’s also a small chute for pre-ground coffee, and a scoop is included in the box.

The 1.8L water tank slides in and out the rear of the machine and has an integrated handle to make the process simple, although I personally prefer a side-mounted tank like the one found on the Philips LatteGo 4400 as I find it makes refilling that little bit easier. However, the KF2’s tank does at least feature a hinged lid, allowing you to fill it up from a jug if you wish.

KitchenAid KF2 water tank
Future
KitchenAid KF2 water tank
Future

KitchenAid supplies a water filter with the KF2 that it claims lasts up to two months when used with standard tap water. If you use filtered water, its life can extend to up to six months. The filter can seem to be a little fiddly to install due to the water tank being so tall. Thankfully the included coffee scoop doubles up as a tool that clips onto the filter, giving you the extra length needed to screw it into place.

The drip tray is deep and extends virtually the full depth of the KF2, and has a large spout integrated into its rear for easy emptying. However, as I found with the KF3 and KF4, when you pour water out it can occasionally spill onto the front panel section as it can’t be removed. It’s not a huge dealbreaker, just prepare for a little extra clean up. Used coffee grounds are deposited into a removable bin in the center that can be tipped out when full. An icon will light up on the front panel to let you know when it’s time.

One of the standout features of the KitchenAid KF2, in my opinion, is its Pannarello steam wand used for milk foaming. I was surprised to find one used, not only because KitchenAid uses a proprietary hose-based system in the KF3 and KF4, but also because other brands such as De’Longhi and Philips have also turned their backs on steam wands (in general) in the pursuit of an entirely automatic coffee-making process.

Personally, I appreciate KitchenAid's choice to include a steam wand here, as it enables you to create genuine milk foam, even when using non-dairy alternatives. In my experience, the hose system on the KitchenAid KF3 and KF4, the LatteGo system on the Philips 4400, and the LatteCrema system on the De'Longhi Magnifica Evo Next all fell short of producing a satisfactory level of milk foam for my taste.

The use of the steam wand does mean there’s some hands-on input required, as you need to hold the jug (which isn’t included in the box) under the steam outlet until the foam reaches your desired level. There’s also no built-in thermometer, so unless you use a third-party thermometer, you’ll have to judge when the milk is ready based on touch.

Whether you are crafting a flat white or a cappuccino, the wand features a small slider for 'more foam' or 'less foam' to ensure you get the perfect texture. By opening and closing the integrated air intake, this slider regulates the airflow: increasing the intake pumps more air into the milk, which creates a more voluminous and aerated foam. Keeping it closed is ideal for texturizing milk for lattes that don’t require as high a level of foam.

The KF2 features thorough cleaning cycles, including the ability to completely evaporate the internal system of water. There are also programs for descaling and cleaning the brewing unit, which require you to press a variation of buttons to initiate. A complete set of useful instructions is included in the box. Do note that none of the removable parts are dishwasher safe.

  • Design score: 4.5 / 5

KitchenAid KF2 review: Performance

  • Consistently well-extracted espresso
  • Steam wand delivers silky, well-foamed milk
  • Lower brewing temperature for iced drinks still too hot

Coffee being poured from KitchenAid KF2

(Image credit: Future)

Having already reviewed the KF3, and knowing it uses the exact same brewing unit, I was expecting the same excellent results from the KitchenAid KF2. Fortunately my expectations were realised, as the compact KF2 produced a great-tasting espresso with each use.

Much of its success can be attributed to the IntelliGrind system that automatically determines the ideal grind size depending on your chosen beans. You can’t see the grinder at work, nor does the unit tell you what grind setting it’s chosen, you just have to put your trust in it to deliver optimal results. Your trust is rewarded.

However, if you're not completely satisfied with the crema or taste of your espresso, then the KF2 does offer the ability to manually adjust the grind to a finer or coarser level by way of a lever behind a compartment on the right-hand side of the machine. A finer setting is recommended for light-roast beans, while dark-roast beans benefit from a coarser setting. Since I was using medium-roast beans, I left the slider at the default setting in the middle.

Before you consider adjusting the grind level, you’ll first want to experiment with the strength of either the espresso or coffee drink presets. As mentioned earlier, there are only three coffee-based drink recipe presets: espresso, coffee and over ice. If you move up to the KF3 or KF4 you’ll gain recipes including latte macchiato, flat white and caffe latte, to name a few.

You can also adjust the volume of water used for each drink type, and the temperature it’s brewed at, by pressing and holding a specific set of buttons. You’ll find the full details in the supplied user manual. I was perfectly satisfied with the default settings, but it’s good to know KitchenAid offers the ability to personalize each drink.

Do note that if you do adjust any default settings, they will become the new norm until you change them again. Since there are no user profiles, you may want to consult with other people in your household before you make any tweaks.

Milk being steamed in pitcher using steam wand on KitchenAid KF2
Future
Milk being steamed using the wand on the KitchenAid KF2
Future
KitchenAid KF2
Future

If you want milk with your coffee, then the Pannarello steam wand is capable of producing thick, velvety foam that’s perfect for lattes, macchiatos and cappuccinos. It’s semi-automatic in use, as all you need to do is hold a milk pitcher under the wand and press the start button on the main unit (once you’ve cycled the ‘drink type’ menu through to ‘steam’). A word of warning, make sure you already have the steam wand submerged in milk. I pressed start with the pitcher still on the drip tray and ended up with milk all over the counter and myself.

A small slider on the side of the steam wand housing can be used to adjust the level of foam you achieve, either ‘less’ or ‘more’. In my tests this worked a charm, with the ‘more’ setting aerating the milk to such a high level that it nearly overflowed from the pitcher.

I much prefer the use of a steam wand compared to the hose systems used on the KF3 and KF4, as it’s capable of producing a much better level of froth. It’s also a hell of a lot easier to keep clean, as it doesn’t require constant rinse cycles to ensure the hose is free of residue. I actually wish the steam wand was featured on the company’s other machines.

Do note however that there’s no built-in thermometer to automatically detect when milk reaches your desired temperature. You’ll either have to invest in a dedicated one, or go off touch to determine when to shut the steam off. Also note that a milk pitcher isn’t included in the box. You can buy one directly from KitchenAid for $19.99 / AU$29. I wasn’t able to find a listing on the company’s UK store, but in all honesty, the pitcher available is relatively basic, so you could always get one from Amazon for the same or less money.

Where the KitchenAid KF2 falls down slightly — in a similar fashion to the KF3 and KF4 — is with its iced drinks function. KitchenAid has designed the KF2 to brew an espresso shot at a lower temperature compared to a regular shot when you select the ‘over ice’ drink type.

For starters, iced coffee fanatics will likely prefer a genuinely cold shot of coffee as opposed to having to pour a cooler shot of espresso over ice. Admittedly KItchenAid isn’t the only company to employ this function, as the Philips LatteGo machines also ask you to put some ice into a cup or glass before brewing an espresso.

However, I can’t agree with KitchenAid’s claim that the iced coffee espresso shot brews at a lower temperature, as I used a thermometer to check the temperature of a regular shot and iced shot, and both returned a measurements between 45ºC/113ºF and 50ºC/122ºF, which was hot enough to quickly melt the ice I had in my glass. It’s not necessarily a huge dealbreaker, but the fact remains there are other machines such as the De’Longhi Dedica Duo and the Jura J10 that are able to pour proper cold-extracted espresso for longer-lasting iced drinks.

It is, however, pleasing to find the KF2, like other KitchenAid espresso machines, is QuietMark-certified, signifying it should be whisper-quiet when grinding and brewing. And in reality, that’s certainly the case. I was able to record an average of 70dB while the machine was grinding and an average of 60dB when brewing. That, perhaps expectantly, puts it on par with the KF3 and KF4. That being said, we found the flagship KF8 to be quieter still with an average of 44dB during the entire coffee-making process.

Control panel of KitchenAid KF2

(Image credit: Future)
  • Performance score: 4.5 / 5

Should you buy the KitchenAid KF2?

KitchenAid KF2 score card

Attribute

Notes

Score

Value

KitchenAid's most affordable fully auto machine offers the best combination of features in my opinion.

4.5/5

Design

Compact form will suit smaller kitchens, although lack of user profiles can add time to brewing process.

4/5

Performance

Excellent coffee and milk frothing, but iced options are a little disappointing.

4.5/5

Buy it if...

You’re short on space

The KF2 is one of the more compact coffee machines we’ve tested, and will slot nearly into smaller kitchen spaces.

You want the essentials done well

The KF2 might not offer an extensive menu of preset drink recipes, but it nails the basics of espresso and coffee.

You drink lattes and cappuccinos

The Pannarello steam wand works wonders to produce thick, velvety foam that’s perfect for milk-based coffee drinks — and it’s great for non-dairy varieties too.

Don't buy it if...

You want a more hands-off approach

With no user profiles and manual input needed for milk, the KF2 isn’t as ‘set and forget’ as many other fully automatic coffee machines.

You don’t like the color black

The KitchenAid KF2 is only available in a matte black finish, which could clash with your kitchen decor.

You like to drink cold brew

The KitchenAid KF2 can’t make it, and its iced coffee espresso shot is still hot enough to quickly melt ice cubes.

KitchenAid KF2 review: Also consider

KitchenAid KF3

This step-up model offers a wider range of drink presets and can automatically foam milk for you via a hose-based system. It also offers four user profiles to save personalized drinks.

Read my full KitchenAid KF3 review

Lavazza A Modo Mio Jolie Evo

If you have a small kitchen and just want a fuss-free coffee, this Lavazza pod coffee machine could be just the thing for you. Espresso is superb and it’s incredibly simple to use.

Read our full Lavazza A Modo Mio Jolie Evo review

Ninja Luxe Café

This 3-in-1 bean-to-cup espresso machine can handle virtually any coffee-based drink you could wish for, including filter and cold brew. It takes care of most of the leg work for you, and is regularly discounted.

Read our full Ninja Luxe Cafe review

How I tested the KitchenAid KF2

KitchenAid KF2

(Image credit: Future)

I used the KitchenAid KF2 over a one-week period. I was confident knowing how to use the machine, having previously reviewed the KF3 and from using the KF4 on a daily basis at home.

I prepared all of the available drink recipes — espresso, coffee and over ice — and used a thermometer to test the temperature of the ‘over ice’ espresso shot to determine if it was actually brewed at a lower temperature, as KitchenAid claims.

I also used the integrated steam wand in both its ‘less foam’ and ‘more foam’ settings to determine if there was indeed a difference in results. I also tested it with dairy milk and a barista-style oat milk to find out if it worked well with non-dairy milk varieties.

Read more about how we test

First reviewed August 2026

Still using one big overhead bulb? 3 lighting experts explain how layering light sources can bring your home to life, and how you can try it yourself tonight

If you’ve not heard of layered lighting, you’re in for a treat. Sure, a single ceiling fixture is the easiest way to illuminate a room, but adding a variety of light sources in different places in a room — a technique known as layered lighting — can completely change the way your home looks and feels, making it more inviting and more practical, without the need to redecorate.

To find out why layered lighting is worth trying, and how you to get started, I spoke experts from lighting companies Paulmann, Govee, and Philips Hue . Hue and Govee are two of the biggest names in smart lights, while German company Paulmann produces a range of rechargeable lights that attach to backplates mounted on the wall with screws or adhesive — ideal if you rent or don’t want to get involved with wiring.

A well-designed environment combines different layers of light

Jerry Lin, Govee

“We believe lighting should do more than simply illuminate a room,” explains Jerry Lin, Product Manager at Govee. “A well-designed environment combines different layers of light to create depth, balance and atmosphere, helping people adapt their spaces for any moment of the day.”

Tom Amelung, Junior Product Manager at Paulmann Licht, agrees that lighting is about much more than just function. “It shapes mood, enhances texture and brings colors to life,” he says. “Without a considered lighting scheme, even the most beautifully designed interior can feel flat and uninspiring. When thoughtfully layered, however, lighting creates depth, adds warmth and brings balance and harmony to a room.”

Bedroom lit using layered Paulmann lights

Tom Amelung of Paulmann says layered lighting can bring a space to life (Image credit: Paulmann)

Think beyond the ceiling

So what are the layers that you should be thinking about? “At its core, layered lighting is about combining four key types of light: ambient, task, accent and decorative, so that they work together seamlessly,” explains Philips Hue’s spokesperson. “The result is a home that not only meets practical lighting needs, but one that also adapts effortlessly to different activities, moods and times of day.

Did you know TechRadar now has membership?

Various tech product cutouts next to the words 'Insider TechRadar Learn More'

(Image credit: Future)

Become a TechRadar Insider by simply clicking 'Join Now' at the top of this page. Have a question? Please email membership@techradar.com

Your central ceiling light can be part of that mix, but you need to think beyond it. “Introducing table lamps, floor lamps, wall lights or light strips adds dimension, highlights architectural features and furnishings, and enhances the richness of colors and textures throughout the room,” adds Hue’s lighting expert.

Amelung suggests trying spotlights as well, thinking outside of the standard grid arrangement that you might already have in your bathroom or kitchen. “A uniform grid of spotlights might feel like the easy option, but it often creates flat, overly bright spaces,” he says. “Instead, position lights based on how the room is used.”

Position lights based on how the room is used

Tom Amelung, Paulmann

That doesn’t mean placing lights directly above seating, though — lights placed directly over your sofa can be harsh and uncomfortable when you’re trying to relax. The same is true in a bedroom, where softer lighting is a better option to avoid making the space feel clinical.

“Place lights above worktops, not behind you, to avoid casting shadows while cooking,” adds Amelung. “Directional options, such as Paulmann’s directional recessed and spotlight options, are ideal for targeting key areas.”

Room illuminated with Philips Hue lights in tropical colors

Think beyond just a big central ceiling light to make the most of your space (Image credit: Signify)

Smart ideas

Smart lights are particularly effective for layering thanks to their versatility. Using connected light fittings lets you transform a space throughout the day without moving anything around. Want to use a corner of your living room as a study during work hours, then use the whole space for relaxing in the evening? With smart lights you can do exactly that, helping delineate spaces that serve multiple purposes.

“One of the greatest advantages of smart lighting is its ability to transform a space throughout the day without requiring any changes to the room’s layout,” says Philips Hue’s spokesperson. “Instead of moving lamps, changing bulbs or adjusting fixtures manually, smart lighting allows you to easily adapt brightness, color temperature and ambience to suit different activities and moods.”

Kitchen lit using layered Paulmann lights

Layered lighting lets you adapt your space depending on the time of day (Image credit: Paulmann)

Your home — and the way you use it — is unique, and smart lights let you personalize your layered lighting setup to suit the way you live.

“With intelligent features such as Govee DaySync, your lighting can automatically adjust its temperature and brightness to match your daily routine, shifting naturally from morning to evening,” says Govee’s Jerry Lin. “At the same time, advanced color management systems such as Govee LuminBlend+ let you explore more lighting experiences, from subtle pastel tones to immersive ambient scenes to strike the perfect mood every time.”

Ultimately, smart lighting gives people the flexibility to create spaces that feel more connected to the way they live,” says Lin.

Go for it!

Are you feeling inspired? I asked Philips Hue where I should start if I want to begin experimenting with layered lighting tonight.
“When layering a room, the use cases could be many,” said Hue’s spokesperson. “Say, for example, in a bedroom – a layered set-up might look like an overhead fixture for clarity, bedside lamps for reading, soft accent lights for atmosphere, and hidden strip lights that trace architectural lines.
“Once everything is dimmed, the room feels cohesive rather than cluttered, with each source playing a distinct role.”

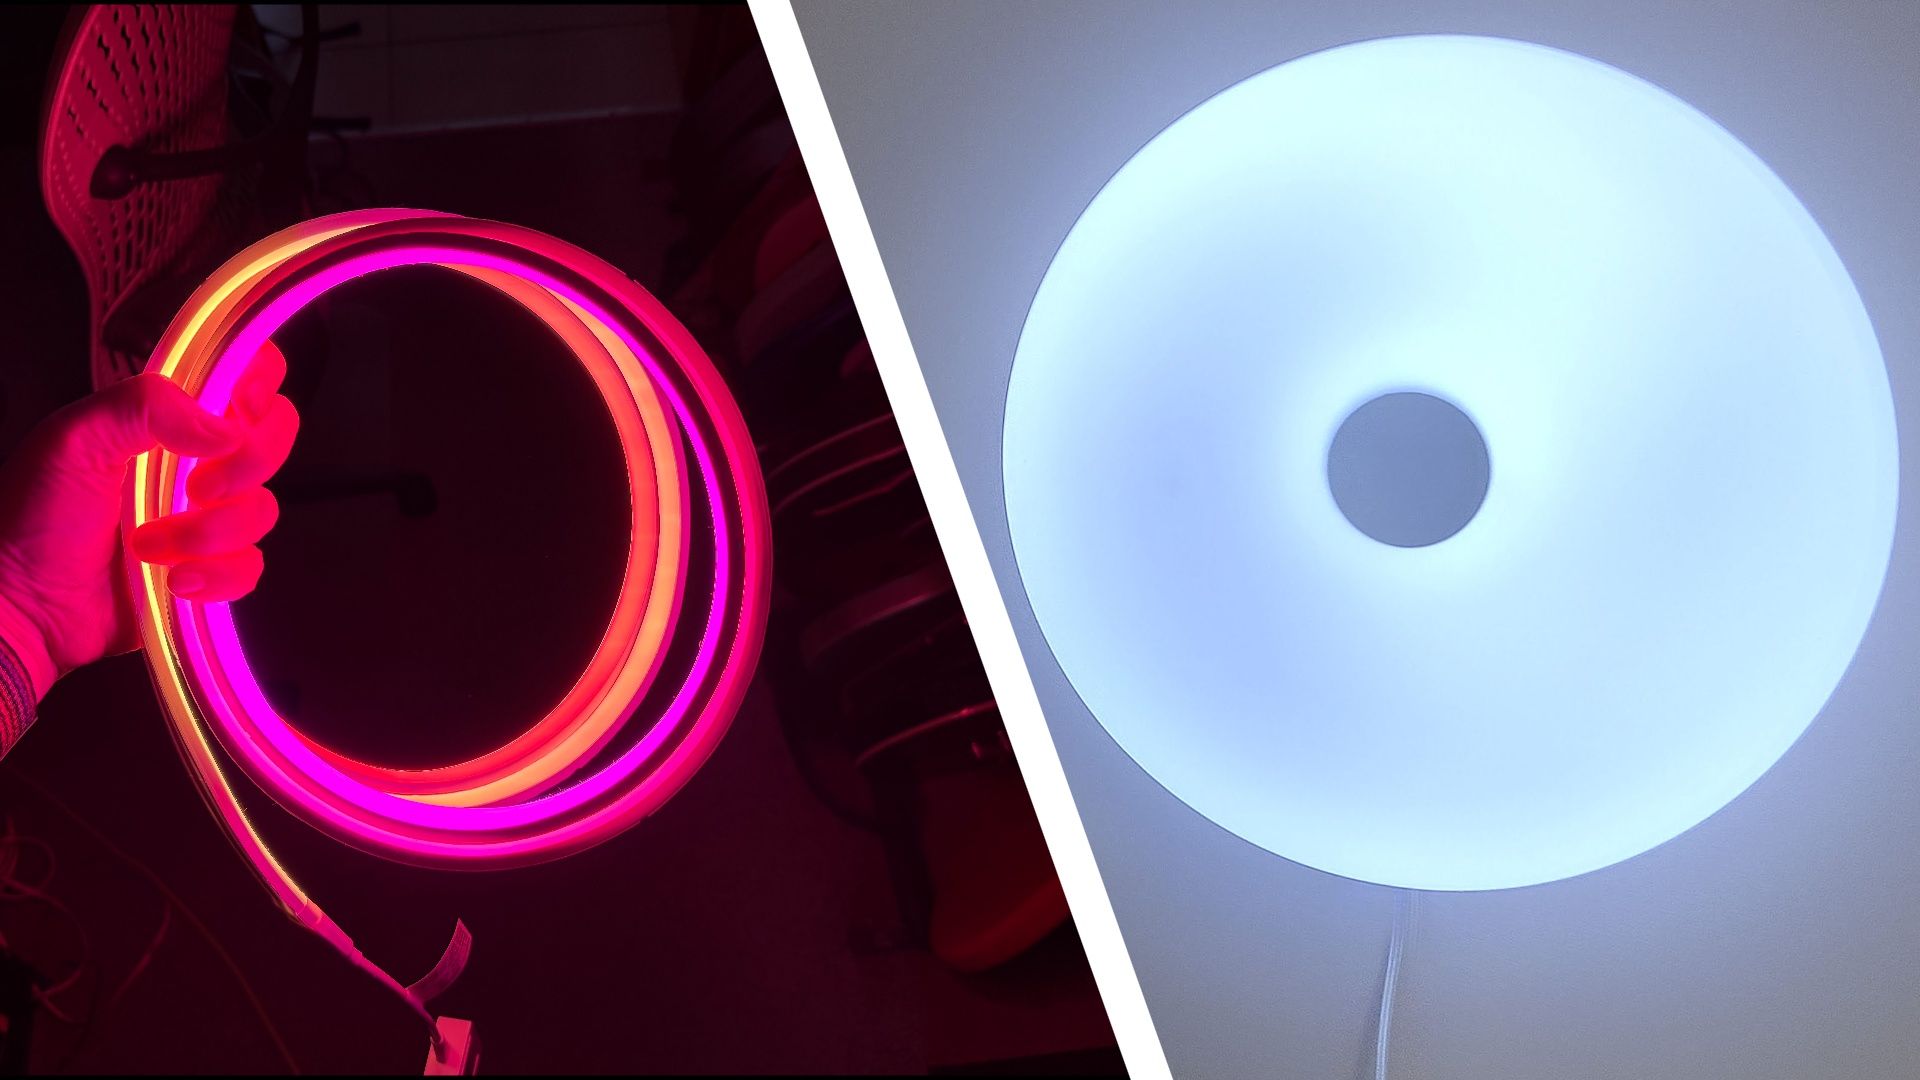
Ready to go? Each expert has suggested four products to help you begin experimenting with layered lighting, including recessed spotlights, table lamps, floor lamps, smart ceiling lights, and gradient light strips. Want even more inspiration? Take a look at our complete guide to the best smart lights.

Lights for layering

Paulmann recessed spotlight

Paulmann
Downlight Cole Round

Paulmann recessed spotlights

Paulmann
LED Downlight Smart Home

Paulmann recessed spotlights

Paulmann
LED Downlight 3-Step-Dim Nova

Paulmann recessed spotlights

Paulmann
LED Downlight Nova Plus Coin Basic Set

Philips Hue ceiling light

Philips Hue
Datura Ceiling Light Large

Philips Hue table lamp

Philips Hue
Go Portable Accent Light

Philips Hue table lamp

Philips Hue
Signe Gradient Table Lamp

Philips Hue light strip

Philips Hue
Omniglow Strip Light 3 M

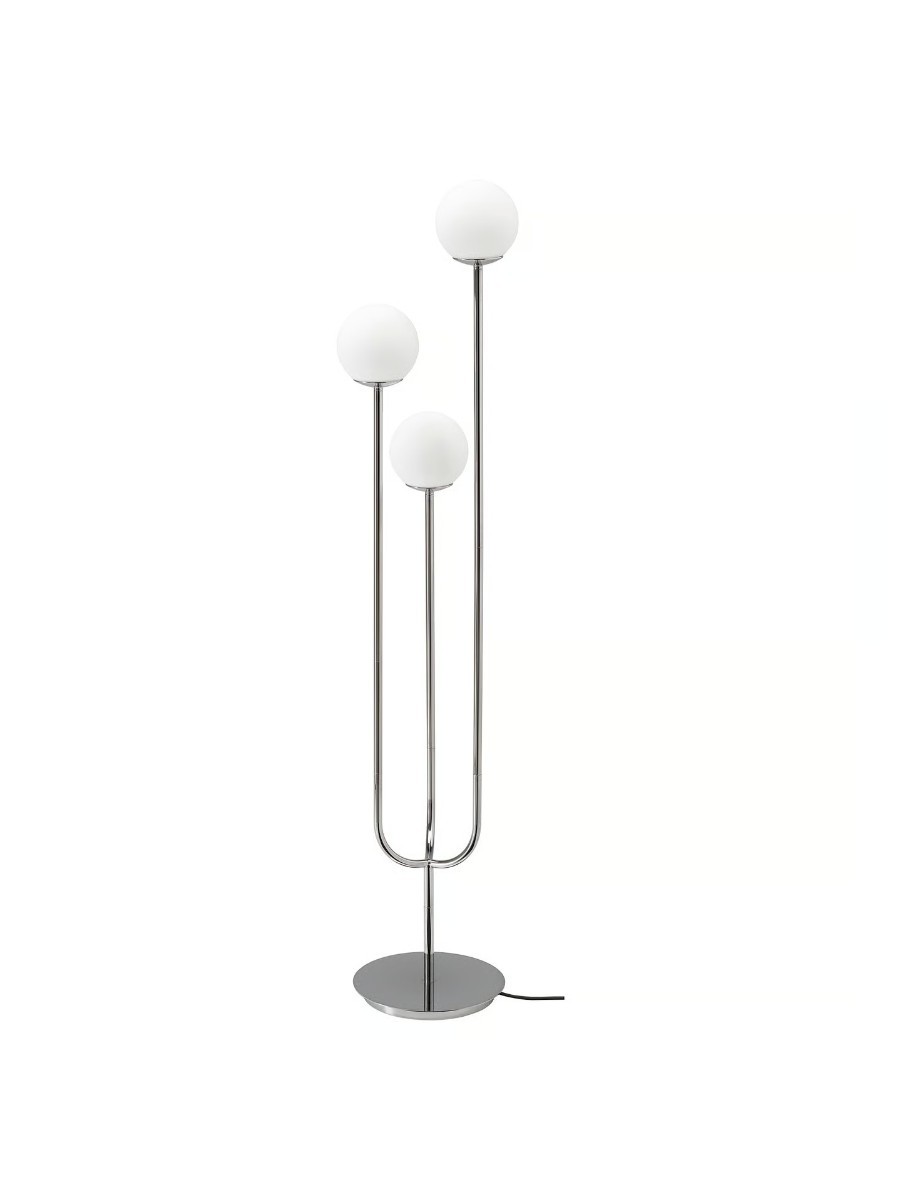
Govee floor lamp

GOVEE
Floor Lamp 3

Philips Hue floor lamp

GOVEE
Lantern Floor Lamp

Govee ceiling light

GOVEE
38cm Smart Ceiling Light Pro

Govee TV backlight set

GOVEE
TV Backlight 3

My whole family used the RunStar 4e Body Scale, and this affordable scale is great for weight — but let down by inaccurate body composition

RunStar 4E Body Scale: One minute review

The RunStar 4E is an affordable smart scale that costs little more than a standard set of electrical scales. Considering it measures more than 20 different body composition metrics, the low price becomes even more impressive. As you’d expect at this price, there are limitations though, with the inability to measure composition accurately (fat-to-muscle ratios and so on) being the most glaring one.

Despite these shortcomings, everything, from app setup to using the scales, is smooth, straightforward, and wonderfully intuitive. Connecting the scales to the companion app is quick and easy thanks to a robust Bluetooth signal, and the option to create multiple users within the app is a nice touch for a family of my size and stage.

The weight measurement consistently measured around 0.4% more than the pricier RunStar 8E SmartScan Pro, which isn’t a massive deviation. For almost all the other measurements, the RunStar 4E adopts a bioelectrical impedance analysis (BIA) measuring method through four metal sensors located on the top panel of the scale.

BMI measurements were almost identical every single time compared to the 8E SmartScan Pro (probably because it's a mathematical calculation not dependent on the electrodes), but almost all other composition measurements offered up a deviation of between 3 and 30%. For these reasons, it’s not likely to make it into our best smart scales guide. That said, for the price, the RunStar 4E is a respectable set of scales for weight and quick BMI calculation.

RunStar 4E Body Scale

(Image credit: Future / Paul Hatton)

RunStar 4E Body Scale: Specifications

Component

RunStar 4E Body Scale

Price

$33.54 / £31.00

Dimensions

11.02 x 11.02 x 0.78 inches

Weight

3.17 pounds

Material

6 mm tempered glass

Display

LCD

Battery

3x AAA

Connection

Bluetooth

RunStar 4E Body Scale

(Image credit: Future / Paul Hatton)

RunStar 4E Body Scale: Price and availability

  • $33.54 / £31.00
  • Not available in Australia
  • Budget-friendly smart scale

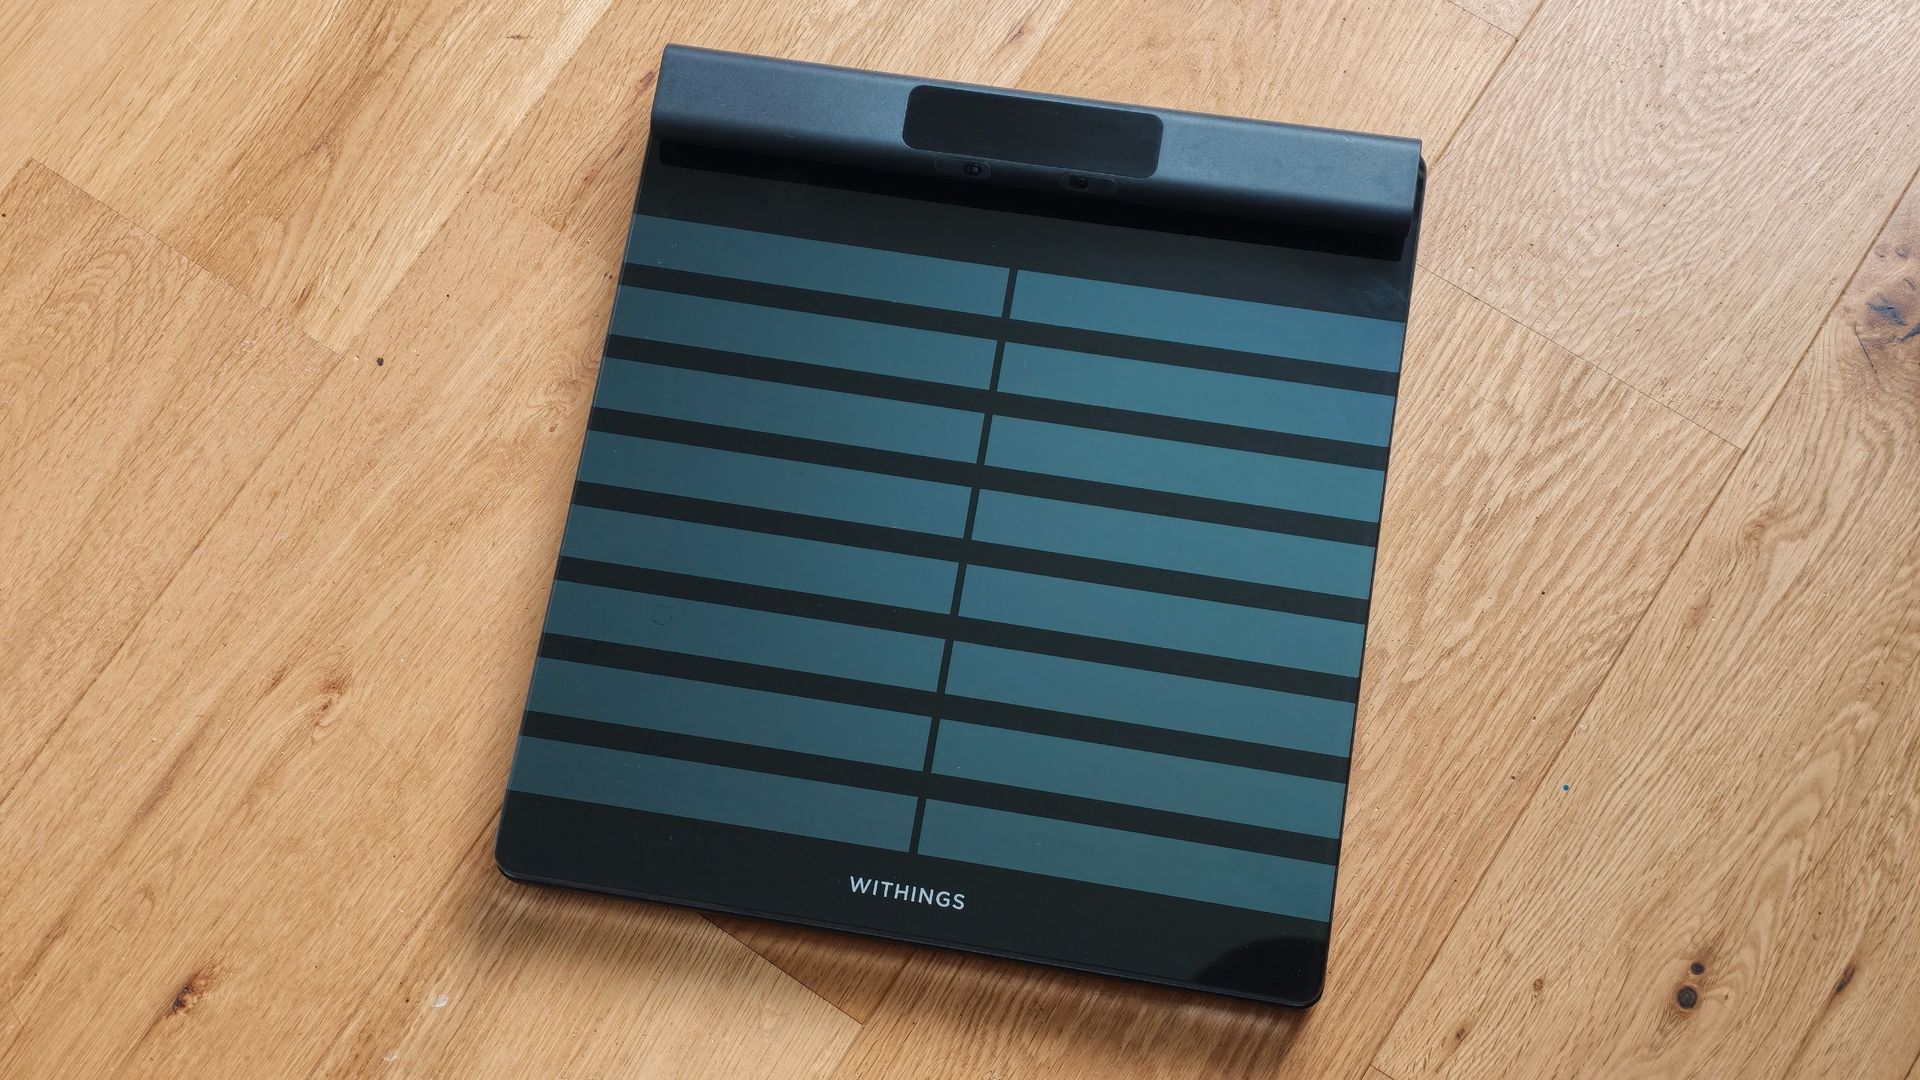
At $33.54 USD / £31.00 GBP, the RunStar 4E Body Scale is incredibly affordable as far as smart scales go. It might lack full body measurements for fat loss and fitness and muscle gain, but for that pleasure you’ll have to part with a lot more money and shoot for something like the RunStar 8E SmartScan Pro, Withings Body Scan series, or Wyze Scale X.

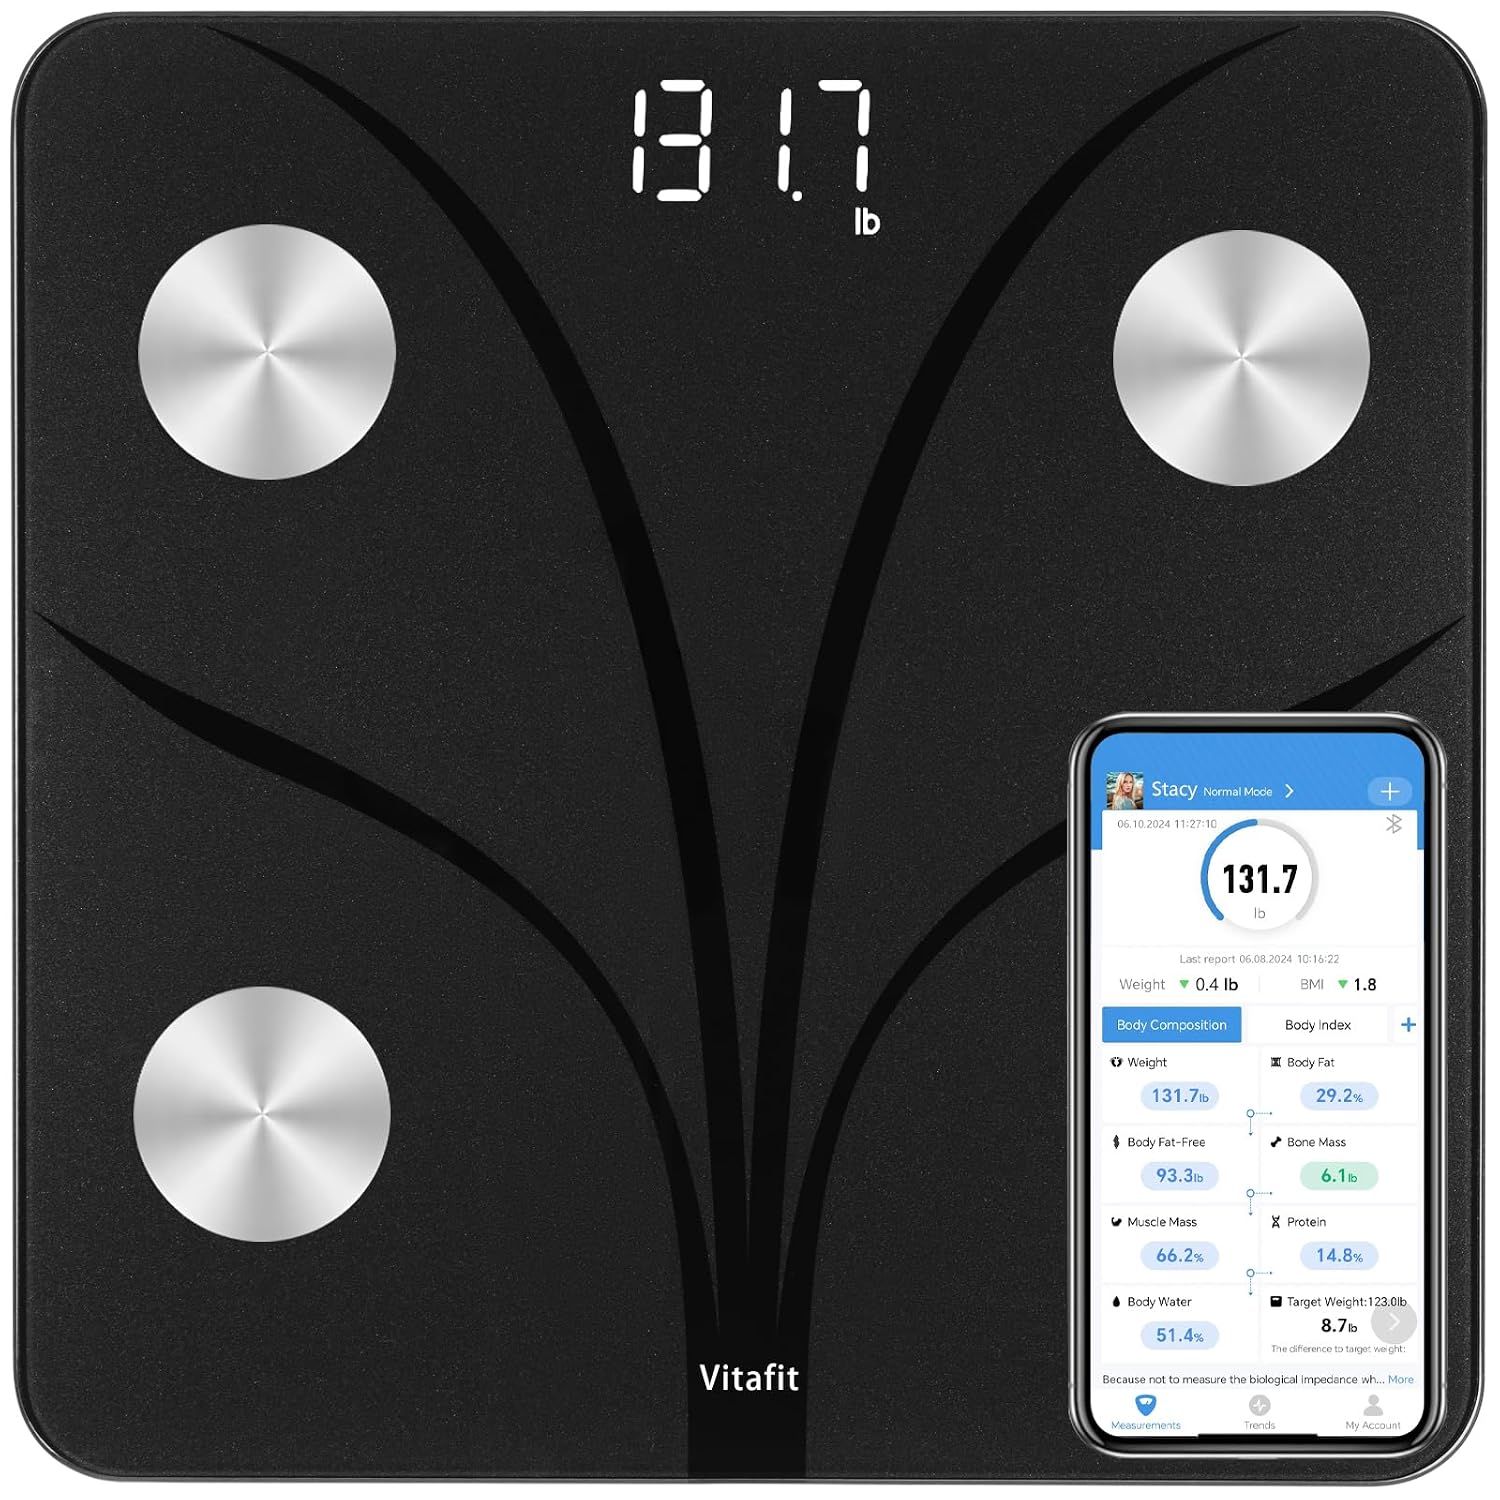
A comparable option in terms of price and features would be the Vitafit Smart Bathroom Scale, which scored a respectable four stars in our testing. Positives included the easy connection, extremely fast results, and the comprehensive app. Our reviewer had some concerns over accuracy, but overall it’s a solid choice.

The scales are FSA and HSA eligible, which means US users are able to use them in conjunction with designating pre-tax money to be taken from pay and put towards paying medical expenses.

  • Value score 4.5/5
RunStar 4E Body Scale
Future / Paul Hatton
RunStar 4E Body Scale
Future / Paul Hatton
RunStar 4E Body Scale
Future / Paul Hatton

RunStar 4E Body Scale: Design

  • LCD display with color graphics
  • Compact and lightweight design
  • Powered by 3x AAA batteries

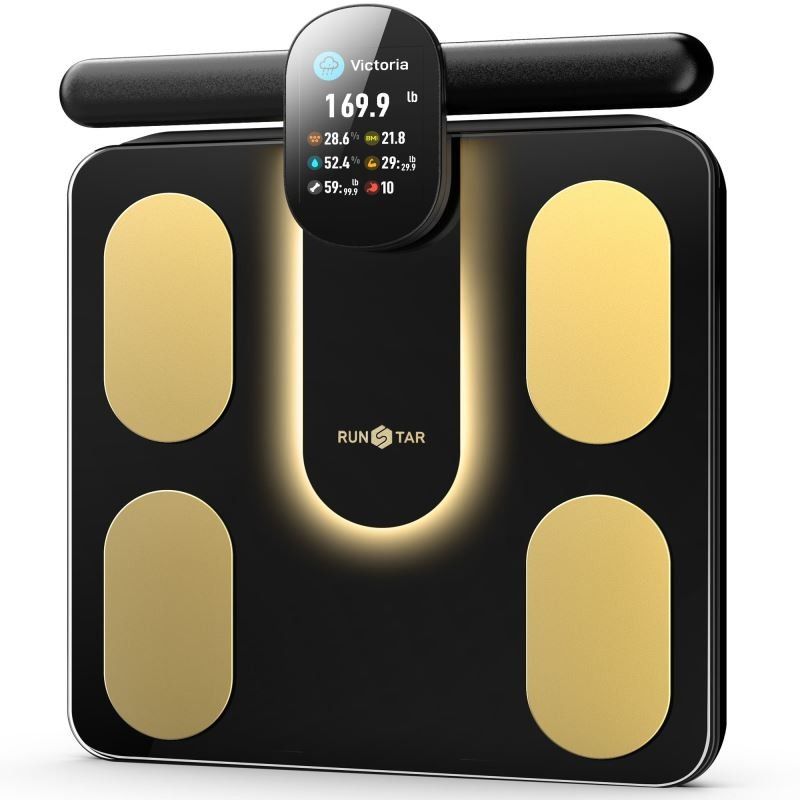
At the heart of the RunStar 4E is a bright LCD display that provides an easy-to-access readout of six metrics: weight, body fat, BMI, muscle mass, body water, and bone mass. The display cycles through these with a few seconds given over to each stat. Unfortunately there’s no way to move to a specific metric using on-device controls, although the full list is available in the accompanying app.

At 11.02 x 11.02 x 0.78 inches and 3.17 pounds, the smart scale is both compact and lightweight. As a result, finding a suitable spot for it in a bathroom or bedroom shouldn’t be a problem. It can also be easily stowed on its side in a cupboard while not in use.

The scale is covered in 6mm tempered glass, which protects against scratches and cracks, neither of which I suffered despite my children doing their accidental best to inflict a dent or two. Underneath you’ll find four anti-slip silicone feet.

Quick and effortless connectivity is via Bluetooth, and power is delivered courtesy of three AAA batteries. USB-C charging would have been better for the environment, but with minimal power required, I don’t envisage getting through too many batteries.

  • Design Score: 4/5

RunStar 4E Body Scale

(Image credit: Future / Paul Hatton)

RunStar 4E Body Scale: Features

  • 22 reportable metrics including weight, BMI, and muscle mass
  • App supports multiple users

The RunStar 4E boasts an impressive feature set for such an affordable scale, or at least it would be if the extras were more impressive. At its core, the scale is capable of measuring over 20 metrics, including weight, BMI, body fat percentage, body mass, muscle mass, body water rate, bone mass, and visceral fat. Six of these are visible on the smart scale itself, while the full set is reported in the Starfit RunStar app.

To accommodate families, the Starfit app enables users to set up multiple profiles, one for each family member. By entering the height and target weight of each person, the app is able to provide more accurate and informed reporting. The app also tracks measurements over time and plots them on a chart for trend analysis.

  • Features Score: 4/5

RunStar 4E Body Scale

(Image credit: Future / Paul Hatton)

RunStar 4E Body Scale: Performance

  • Quick results on-device and in-app
  • Accurate weight, BMI, and metabolic age
  • Some inaccuracies consistently reported

The first thing to note is that the RunStar 4E is quick. In a matter of seconds the scale is able to measure over 20 different body composition metrics and display them instantly in the app. There’s no waiting around for calculations to be made and zero lag when the display is cycling through the six core metrics.

Weight, as you’d expect, is measured prior to all the body composition elements. Having measured myself hundreds of times, I found that the 4E regularly mismeasured my weight by around 0.4% compared to the RunStar 8E SmartScan Pro and, indeed, my rudimentary pair of digital weight scales. It would be unfair to judge the scales too harshly for this small deviation, especially given the price.

According to research published in the Journal of Medical Internet Research, one study conducted on smart scales shows a median margin of error of around 0.3kgs, so I can forgive it some small deviation. That said, if you’re requiring absolute accuracy, you’ll need to look elsewhere.

BMI was also consistently measured more or less accurately, with deviations of only 0.5%. If you’re only concerned with quick measurements such as weight and BMI, then the RunStar 4E won’t cause you any problems.

RunStar 4E Body Scale

(Image credit: Future / Paul Hatton)

Getting into the specifics, musculoskeletal-related measurements using BIA include muscle, muscle mass, and skeletal muscle rates. The first two measured around a 3% deviation from the 8E SmartScan Pro, but it was the skeletal muscle rate which was most concerning, measuring a deviation of nearly 15%.

Unfortunately variable results continue with fat-related metrics. Compared to the SmartScan Pro, body fat percentage, subcutaneous fat, and body fat mass all reported a massive 30% deviation.

Despite comparably poor results on some metrics, it’s worth remembering that most of these are specialized measurements, and to expect too much from a smart scale that costs $33.54 / £31.00 might be a little unreasonable.

That said, it would be preferable for consumers if smart scale manufacturers would only include metrics that they could report on accurately. The RunStar 4E also measures consistently with itself, which means it can still be trusted as a weight loss tool assuming you allow for the margin of error.

  • Performance score: 3.5/5

RunStar 4E Body Scale: Scorecard

Category

Comment

Score

Value

An impressive smart scale given its budget-friendly price point.

4.5/5

Design

A compact and lightweight smart scale with a bright LCD display.

4/5

Features

Over 20 body composition metrics with the RunStar app providing a reasonable level of trend analysis.

4/5

Performance

Weight and BMI are accurate, but other measurements are subject to sizable deviations.

3.5/5

RunStar 4E Body Scale: Should I buy?

Buy it if...

You’re looking for a decent affordable smart scale

A surprisingly solid set of features for such a cheap scale.

You only care about working towards a healthier BMI

As well as weight, the RunStar 4E delivers accurate BMI calculations.

Don't buy it if...

You want to be able to sync results with health apps

The RunStar isn’t capable of linking in with any sort of wider ecosystem.

Also consider

Vitafit Smart Bathroom Scale

A similarly priced smart scale with a comparable set of features. Boasts a slightly larger display and a more comprehensive app experience.

Vitafit Smart Bathroom ScaleView Deal

RunStar 8E SmartScan Pro

A superior, and pricier, smart scale capable of measuring more metrics and breaking them down into specific parts of the body.View Deal

How I tested

My family (two adults and three children) has been using the RunStar 4E for three months. We’ve used it to measure and track all types of metrics, including weight, BMI, and muscle mass. I carried out comparison tests with the more premium RunStar 8E SmartScan Pro. In addition, I’ve used every feature of the app to give the smart scales a thorough testing.

First reviewed: July 2026

Keen to get Alexa+ but don’t have the necessary hardware? These are the 9 Amazon devices we recommend to get you up and running

The news that Amazon’s smarter AI assistant, Alexa+, is finally making its way to Australia could well be exciting news for many Aussies. After all, we’ve had to wait a fair amount of time for the upgraded digital assistant, as it launched in the US way back in February 2025, and arrived on UK shores in March of this year.

If you’re already embedded in Amazon’s ecosystem, whether that be through ownership of Echo smart speakers and displays or Ring home security cameras, you’d be forgiven for thinking Alexa+ might never make it Down Under. If so, you may have never felt the need to upgrade your various Amazon devices to newer generations.

Now with the official rollout of Alexa+ in Australia, that could mean your devices aren’t compatible. In truth, the list of incompatible devices is relatively short (which I have to say is quite remarkable and deserves brownie points for Amazon), but regardless, the latest generation Alexa-enabled devices will offer the best Alexa+ experience.

So, if you want to add Alexa+ to your home to become an AI-powered digital assistant capable of performing all manner of tasks, from answering simple queries to placing Amazon orders on your behalf or even notifying you when packages are delivered to your home (and are captured on a Ring camera), then any of these nine Echo devices will be worthy additions to your home.

Also note that you'll need a subscription to Alexa+. It's free if you're already a Prime member, otherwise it costs AU$29.99p/m. Considering an Amazon Prime membership is just AU$9.99p/m, you'd be saving money.

Amazon Echo Studio

Amazon
Echo Studio (2025)

Amazon Echo Studio

Amazon
Echo Studio

Amazon Echo Dot Max

Amazon
Echo Dot Max

Amazon Echo Dot

Amazon
Echo Dot (5th Gen)

Amazon Echo Spot

Amazon
Echo Spot (2024)

Amazon Echo Hub

Amazon
Echo Hub

Amazon Echo Show 8

Amazon
Echo Show 8 (4th Gen)

Amazon Echo Show 11

Amazon
Echo Show 11 (2025)

Amazon Echo Show 15

Amazon
Echo Show 15

The best dual-zone air fryers — convenient, multi-component cooking for a crowd

Air fryers aren't just for small cooking tasks or one-to-two person households. There's a new wave of air fryers that come kitted out with two drawers, enabling you to cook two components of a meal at once. They offer more space than your standard, one-drawer offering, and provide an easy way to keep different foods separate, but they also go further than than that.

You can pick a different temperature for each drawer, and most will have a sync function that means the appliance will automatically figure out your timings and sync up cooking so both drawers of food are finished at once. If you have a small kitchen, there are a number of models that have the two drawers stacked one on top of the other, to provide a generous cooking capacity without eating up all your counter space. It's enough to make you want to retire your proper oven for good.

We have a general guide to the best air fryers, but in this roundup I've narrowed things down to just my favorite two-drawer options. The main name to look out for is Ninja — this brand makes a wide variety of dual-zone options of different sizes and with different functions. I've included a number of options below, but I've also featured alternatives from rival brands, including some budget-friendly options.

Double trouble

Ninja Foodi Dual Zone Digital Air Fryer, 2 Drawers, 6-In-1, Black Af300uk

Ninja
AF300UK Foodi Dual Zone Air Fryer

Ninja Air Fryer Doublestack Xl, 10 Qt, 6-In-1, Deep Grey, Sl401

Ninja
DoubleStack XL air fryer

Pros

  • Small footprint, generous capacity
  • Extra trays for even more cooking space
  • Top-tier performance

Cons

  • Expensive for a dual-basket model
  • '8-portion' capacity feels ambitious
  • Can't fit big foods whole

Philips Airfryer 4000 Series Stacked Dual Basket, Stacked Air Fryer With 2 Baskets, 10l, Rapidair Technology, 45% Less Space Required, Pfas Free Ceramic Coating, Viewing Window (na462/70)

Philips
4000 Series Stacked Dual Basket Air Fryer

Pros

  • Cooking windows and basket lights are a handy addition
  • Space-saving design takes up less counter space
  • Versatile cooking functions, strong cooking performance

Cons

  • Supplied physical instructions are too basic
  • The black and gold finish will split opinion
  • 5L baskets means larger food won’t fit

Chefman Turbofry Touch 9 Qt. Air Fryer Rj38-Sqpf-45tdb

Chefman
9qt Air Fryer

Ninja Crispi Dualzone™ Glass Countertop Air Fryer in Bone

Ninja
Crispi DualZone Glass Countertop Air Fryer

Philips 3000 series air fryer

PHILIPS
Dual Basket Air Fryer 3000 Series, 9.5 Quarts

Russell Hobbs Dual Air Fryer 9l Rapid Airfryer [dual Basket/zone, Low-Noise, 9 Programs] Satisfry (dishwasher Safe Drawers, Max 200℃, Oil Free Cooking, Roast, Bake, Grill, Keep Warm) 27680

Russell Hobbs
Satisfry Dual Basket Air Fryer 9L

Cuisinart 11qt Dual Zone Basket Air Fryer With Viewing Window Black Adz-112

Cuisinart
11-qt Dual Basket Air Fryer Pro ADZ-112

Tower air fryer

Tower Housewares
Vortx 7.6L Dual Basket Air Fryer (UK only)

Tower air fryer

Tower Housewares
Vortx 11 Litre Dual Layer Air Fryer (UK only)

Heatwaves are getting so bad you can buy this portable 'human fridge' in Japan to save you from heatstroke —and it'll blast you with 41F air

  • The Do Hiemon Box will cool you down for 20 minutes
  • It blasts air on you at temperatures of 5°C or 41°F
  • The units are being sold to construction sites and golf courses

If you're in Japan, you have an alternative to air conditioning units and portable fans when it comes to staying cool in sweltering temperatures: a human-sized refrigerator that you can sit inside when the heatwaves get too much.

This is the Do Hiemon Box from Trusco Nakayama (via The Japan Times), and it'll blast your body with air cooled down to a refreshing 5°C or 41°F — about the same temperature as a chiller in a standard refrigerator.

It requires no installation, can be moved on wheels, and according to Trusco Nakayama it beats other solutions by cooling the entire body down evenly. After 20 minutes, the unit automatically switches off to prevent overcooling, and you're back out into the heat.

As per The Japan Times, a couple of hundred of these units have been sold across construction sites, golf courses, leisure facilities, and university campuses since the chamber went on sale earlier this year.

It'll cost you

You need a standard electrical outlet for this to work, and you also need access to the 1.5 million yen it costs (that's about $9,480 / £7,040 / AU$13,460). These personal cooling machines don't exactly come cheap.

The idea is that you get quick, temporary protection against heat exhaustion and heatstroke — a growing problem in our warming world — rather than using this as an air conditioned office or a space to relax in.

According to a Trusco Nakayama executive speaking to The Japan Times, enquiries about the fridge have come from as far afield as Germany and the US. The company is hoping to find more business at summer festivals and shopping malls.

Before long you might find yourself queuing up for a slot in the human fridge as well as for the loos at your next festival trip — another depressing sign of the consequences of climate change that show no signs of being reversed.

G’day, Alexa+: Amazon's AI-upgraded smart home assistant has finally arrived in Australia — and it's fully fluent in 'Strayan

  • Amazon touts Alexa+ as its voice assistant’s “biggest leap forward”
  • Aussies can now request early access to Alexa+, but it’s also available with the purchase of a new eligible Echo or Fire TV device
  • Prime members get Alexa+ for free after early access ends in November; non-members pay AU$29.99p/m

Alexa+, the conversational AI upgrade of Amazon’s long-time voice assistant, has officially launched in Australia, over a year after rolling out in the US.

This “smarter, more conversational and more capable” voice assistant promises a more transactional experience that recognises natural language, can remember user preferences and automatically adjust your smart home tech, like turning on your air conditioning when it starts to get warm or turning on lights when it starts getting dark.

For its local debut, Amazon has added Aussie touches, so Alexa can now understand colloquialisms like ‘arvo’, ‘snags’ and ‘servo’, as well as being “tuned into Australian culture”, like not mixing up footy codes or understanding expressions like ‘fair dinkum’ or ‘passing the pub test’.

You can sign up for an early access invite now if you already own a compatible device, or get automatically signed up when you buy an eligible Echo or Fire TV device. After early access ends on November 30, 2026, Alexa+ will remain a free Prime benefit for subscribers, while non-members will have to pay AU$29.99 per month to retain access.

Most of the current Echo devices are compatible with Alexa+, with only the now-discontinued first- and second-generation models unable to support the new voice assistant. Fire TV devices, meanwhile, will have limited compatibility with Alexa+, with support available only on the following:

  • Fire TV Stick 4K Select
  • Fire TV Stick 4K Max (2nd Gen)
  • Fire TV Stick 4K Plus (2nd Gen)
  • Fire TV Cube (3rd Gen)

Alexa+ isn’t the only ‘smart’ voice assistant available in Australia, with Google Home Premium (formerly Nest Aware) being its main competitor. The latter costs AU$15 per month or AU$150 per year for its Standard tier, or AU$30 or AU$300 per year for the Advanced tier, scoring Alexa+ points on pricing — provided you’re a Prime member or course.

It remains to be seen whether this would trigger a Prime membership price hike in the days to come.

Do we really need an Amazon-powered LLM in our lives?

Amazon claims that Aussies interact with Alexa “more than two billion times each year”, with 77 million questions asked and more than 600 million smart home actions in 2025 alone. While that suggests there’s a large customer base in Australia, it begs the question of whether we’re willing to bring another AI assistant into our homes and, importantly, pay extra for it.

As my colleague Graham Barlow rightly pointed out, Alexa+ may be an improvement by being more conversational and context aware, but it doesn’t really do enough to warrant the consistent use of the assistant.

Lots of Redditors have also expressed their displeasure with Alexa+, with some choosing to revert back to the old Alexa for the many ads, the style of the new voices, or just preferring not to opt into the upgrade.

Sure, being a free add-on to Amazon Prime will see plenty of early adopters, but it remains to be seen if Aussies will jump ship from ChatGPT, Gemini, Claude or whatever LLM they’re already using and move to Alexa+. (Incidentally, a web version is also slated to come soon.)

Then again, AI is evolving and Alexa+ seems like the next step in the voice assistant’s development, although it will need to do more than just speak fluent 'Strayan if it wants to reign supreme Down Under.

I just gave this stick vacuum 5 stars and now it's half off — get the Samsung Jet 95S for just AU$399

It's been a day since I published my Samsung Jet 95S review and, as I mentioned, this cordless vacuum cleaner is full of surprises. From its unimposing size to being lighter than some of its competition, to even fully harnessing its excellent 280AW of suction, the Jet 95S is very easy to recommend even at full price.

But why would you do that when you can pick it up for 50% off? That's right: the Samsung Jet 95S, which is already good value at AU$799, is now discounted to just AU$399 at JB Hi-Fi.

That's a very budget price and excellent bang for your hard-earned buck to spend on a vacuum cleaner that I gave a full five stars to — and I've been reviewing vacuum cleaners for nearly a decade and have rarely done so. The Jet 95S is now my pick of the best vacuum cleaner in Australia.

Samsung has only slashed the price by AU$100, and no other retailer is currently matching JB Hi-Fi's half-price offer, making this the best vacuum cleaner deal I've seen in a very long time. That's more so because I can't fault this stick vac for anything — not its performance, its attachments or even its full price.View Deal

It may not have self-emptying like many a Shark vacuum cleaner or may not be looker like some of its Dyson counterparts, but what the Samsung Jet 95S has in spades is performance.

As I said in my review, it's in the same league as the Dyson Gen5detect Absolute with 280AW of suction, but it manages to outperform its competition thanks to four suction modes, with the Jet setting so darn powerful, I found 100% hair pickup from a rather dirty mid-pile carpet.

In fact, the Jet 95S aced all my tests in just its Mid suction setting, which is the second level up from Min (aka minimum, of course), and found it performed better than Dyson's Auto mode — albeit just barely.

I'm even a big fan of the Flex Tool that ships with the Jet 95S, which helped me get to awkward corners and high up on ceilings to clean behind my sofa and even an air-conditioning vent that's 90º to my ceiling. The other two accessories are stock standard, but you do get a Pet Tool+ attachment that's good at picking up small and thin strands from upholstery, bedding and all kinds of floor types.

Samsung Jet 95S display showing runtime

(Image credit: Sharmishta Sarkar / TechRadar)

The Slim LED floorhead has a very bright headlight that doesn't highlight dust particles like Dyson's Fluffy Optic does, but at least it lets you see under the bed or other low-lying furniture where light doesn't typically penetrate. This floorhead is only for hard floors though.

The all-round useful floorhead is the Jet Dual Brush+ that I found a little difficult to manoeuvre around the house, even on hard floors, but the Samsung vacuum isn't as heavy as some other models, so exerting a little extra energy is doable here. The clean you get from this floorhead, though, is exceptional, and I found no tangling of long hair strands during my testing.

I even love the fact that the wand is expandable, unlike Dyson.

Honestly, for a fraction of the Gen5detect's price, you're getting the same suction power and excellent cleaning performance, in a package that's easy to use and store. It's an absolute steal at just AU$399!

Lavazza's A Modo Mio Jolie Evo is the tiniest coffee machine I've ever tested, and brews a delicious espresso — but there's one sustainability catch you should know about

Lavazza A Modo Mio Jolie Evo: one-minute review

The Lavazza A Modo Mio Jolie Evo is an exceptionally small capsule coffee maker, which brews espresso using the company's own A Modo Mio pods. These vacuum-packed capsules are available in a wide variety of coffee types, roasts, and blends, but unlike Nespresso capsules, there are no elaborate brews with added flavors to choose from.

That's no bad thing in my opinion, because the Jolie Evo produces some of the best espresso I've had from a pod machine, and flavored coffees often tend to taste artificial.

The Jolie Evo is very reasonably priced too (considerably less than the A Modo Mio Smeg and A Modo Mio Deséa), though you'll need to pick up a standalone milk frother too (I recommend either the Smeg Mini Milk Frother or Philips Baristina Milk Frother) if you want to make lattes and cappuccinos.

The controls are extremely simple, with just a single button and a large lever. However, bear in mind that there's no timer, so you'll need to manually tap the button to stop the flow once the machine has dispensed the right amount of coffee.

Overall, it's an excellent compact espresso machine. For me, the only real drawback is that the plastic pods aren't particularly easy to recycle. They can only be dropped off at designated collection points, which can be scarce outside big cities.

Espresso made using Lavazza Jolie Evo coffee maker

(Image credit: Future)

Lavazza A Modo Mio Jolie Evo: specifications

Name

Lavazza A Modo Mio Jolie Evo

Type

Capsule coffee maker

Dimensions (W x H x D)

4.9 x 8.3 x 13 inches / 124 x 210 x 330mm

Weight

5.7lbs / 2.6kg

Water tank capacity

20.3oz / 600ml

Lavazza A Modo Mio Jolie Evo: price and availability

  • List price £99 / AU$129 (about $190)
  • Widely available in UK and Australia
  • Listed on Lavazza's US site, but not available at the time of writing

The Lavazza A Modo Mio Jolie Evo has a list price of £99 / AU$129, which is about $133, but at the time of writing the machine doesn't seem to be available to actually buy in the US — even though it's listed on Lavazza's site. So it may become available in the future.

If you're in the UK, you can get the coffee maker for £49 if you subscribe to Lavazza's coffee capsule delivery service.

Even at full price, that's very reasonable for a good quality capsule coffee maker. For comparison, the Lavazza A Modo Mio Smeg is £249 / AU$349 (about $350), while the Lavazza A Modo Mio Deséa is £249 / AU$349 (about $330) — though the latter machine also has a built-in milk-frothing system.

Lavazza Jolie Evo coffee maker front panel with logo

(Image credit: Future)

If you want to make lattes and cappuccinos with the Jolie Evo, you'll need a standalone milk frother like the Lavazza MilkEasy Plus, which is priced at £79 / AU$119 (about $150) — or the Smeg Mini Milk Frother or Philips Baristina Milk Frother I mentioned earlier.

  • Value score: 4.5/5

Lavazza A Modo Mio Jolie Evo: design

  • Ideal for small kitchens
  • Only two controls (lever and button)
  • Lever is ergonomic and easy to use

The Lavazza A Modo Mio Jolie Evo is easily one of the smallest coffee makers I’ve tested, measuring a mere 4.9 x 8.3 x 13 inches / 124 x 210 x 330mm (W x H x D). That’s even tinier than the diminutive Nespresso Vertuo Pop, which is 5.3 x 9.8 x 16.7 inches / 136 x 250 x 426mm. It’s ideal for slotting into small spaces, and you can even route the power cable right or left underneath the machine if you need it to sit against a wall.

The Lavazza machine looks classier than its Nespresso counterpart as well, with a smart matte finish and a large chrome handle on top. Pulling this handle up opens a slot on top of the machine. so you can slide a coffee pod inside.

Person inserting coffee pod into Lavazza Jolie Evo coffee maker

(Image credit: Future)

Pushing it back down closes the drawer and pierces the pod, and pulling it up a second time will drop the used capsule into a small bin behind the Jolie Evo’s drip tray. The bin has a grille at the bottom that allows the pods to drain so they’re dry when you remove them for recycling, which is a thoughtful touch.

The large lever is easy to grip and requires barely any force to move, which makes this a particularly good option for people with limited strength or mobility in their hands.

The drip tray has a plastic grate that can be removed for easy cleaning, and is just the right height for an espresso cup. A standard size cup or mug will fit neatly under the dispenser with the drip tray detached.

Person raising handle of Lavazza Jolie Evo coffee maker

(Image credit: Future)

Other than the handle, there is just one control on the Jolie Evi: a button on top of the machine, with a white light to indicate the machine’s current status: blinking means heating, and white means ready to brew.

It’s available in black and white in Australia, with a gray option also offered in the UK. It was sold in green and red too when it launched in the US.

  • Design score: 5/5

Lavazza A Modo Mio Jolie Evo: performance

  • Extremely simple to use, but there's no timer for the coffee dispenser
  • It makes delicious espresso in moments
  • Its pods can be hard to recycle compared to Nespresso aluminum ones

What makes the Jolie Evo different from all other capsule coffee makers I’ve tested to date is its lack of a timer for brewing different sized drinks. Once you’ve pressed its single button, the little machine will continue dispensing coffee (or hot water, if there’s no pod inside) until you either tap the button again or the tank is empty.

This isn’t ideal if you want to leave your coffee maker to handle itself while you’re preparing the rest of your breakfast, but making a double espresso takes less than a minute so it’s no real hardship.

I would recommend using a measuring cup as your recepticle, though, at least until you’ve got your eye in, because it’s easy to under or over-estimate the output. You could use a coffee scale to a perfect measure, but it would be overkill; this entry-level machine makes a very good espresso, but it’s not intended for real aficionados.

Lavazza Jolie Evo coffee maker dispensing espresso

(Image credit: Future)

It uses Lavazza’s own A Modo Mio capsules, which are excellent value compared to most coffee pods. Different types command different prices, but you can pick up 80 Qualità Rossa pods direct from Lavazza for £24.50 (about $30 / AU$50). That’s just over 30p per drink, compared to 49p for the cheapest Nespresso Vertuo pods.

Unlike Nespresso, the Modo Mio selection doesn’t include elaborate flavored drinks; there are various beans, blends and roasts to choose from in Lavazza’s store, but each pod contains only ground coffee with no extras. That's no bad thing, in my opinion — coffee capsules with added flavors can taste unpleasantly artificial.

Lavazza Jolie Evo coffee maker dispensing water to make americano

(Image credit: Future)

I tested the Jolie Evo with three of Lavazza’s coffees: Qualità Rossa, Passionale, and Qualità Oro. Each comes in a box of 16, and is marked with an intensity score out of 12 to give you an idea of what to expect. The first is a blend of robusta and arabica beans, while the other two are 100% arabica.

My personal favorite was the Qualità Oro, which produced one of the best-tasting espressos I’ve had from a capsule machine and is described as “Sweet and delicate taste, with an intense and fragrant aroma”.

It goes particularly well with milk in a white americano or (if you also pick up a milk frother) a creamy latte.

The problem with these pods, delicious though they are, is that they can be difficult to recycle. Nespresso pods are made entirely from aluminum, which is relatively easy to process once the coffee grounds are removed, and there’s almost certain to be a location nearby where you can drop off the used capsules. If not, you can mail them off for recycling with a pre-paid bag.

Used coffee pods in Lavazza Jolie Evo coffee maker

(Image credit: Future)

By contrast, Lavazza A Modo Mio pods are mostly plastic and can be recycled in the UK through the company’s partnership with Terracycle, but collection points are few and far between.

If there’s nowhere to drop off your pods, your only option is to start your own collection point, accepting pods from other people and sending them for processing yourself. Individuals can’t send their pods in the mail.

South England is relatively well-served, but at the time of writing there are only four drop-off points in Scotland, and none at all in Wales or Northern Ireland.

  • Performance score: 4/5

Should you buy the Lavazza A Modo Mio Jolie Evo?

Lavazza A Modo Mio Jolie Evo Score Card

Attribute

Notes

Score

Value

The most affordable A Modo Mio coffee maker, though not currently available in the US.

4.5/5

Design

Stylish and super compact, with ergonomically designed controls.

5/5

Performance

Brews delicious espresso, but lacks a timer to stop flow, and pods can be hard to recycle.

4/5

Buy it if

You have a small kitchen
This is the most compact coffee maker I've tested to date, and the fact its cable can be routed to the right or left means you can push it right up against a wall if you need to.

You have limited dexterity in your hands
The large lever handle requires virtually no effort to push and pull, and there's just one button to worry about. All removable pieces are easy to detach for cleaning as well.

Don't buy it if

You want elaborate flavored coffees
A Modo Mio capsules are full of nothing but unadulterated ground coffee, so if you want something fancier you'll need to add your own syrup.

You want easily recyclable coffee pods
A Modo Mio capsules are plastic and can only be recycled if you drop them at a designated collection point. You can't send them in the mail for processing.

Lavazza A Modo Mio Jolie Evo: also consider

If you're not sure whether the Jolie Evo is the right espresso machine for you, here are two others to think about.

Lavazza A Modo Mio Deséa
This is Lavazza's most advanced A Modo Mio machine, with its own built-in milk frother, though it's only compatible with Lavazza's own glass mug.

Read our full Lavazza A Modo Mio Deséa review

Bosch Tassimo Finesse Friendly
Just as easy to use as the Jolie Evo, and affordably priced too. There's a huge range of Tassimo pods to choose from, though they can get pricey — particularly ones for milky drinks that require two capsules each.

Read our full Bosch Tassimo Finesse Friendly review

How I tested the Lavazza A Modo Mio Jolie Evo

I used the Lavazza A Modo Mio Jolie Evo in place of my usual espresso machine for two weeks. I used three different types of A Modo Mio capsules (Qualità Rossa, Passionale, and Qualità Oro), drinking it neat as an espresso, and using the Jolie Evo to add extra hot water to make an americano.

I set up and cleaned the machine following the directions in the instruction manual, and allowed the components to air-dry before reassembly.

I spent two months cleaning with the Samsung Jet 95S stick vacuum and I’m shocked at how well it performs — and for a good price too

Samsung Jet 95S: Two-minute review

I'm no stranger to testing powerful cordless vacuum cleaners, and have crossed paths with models that have boasted 280AW of suction before — my Dyson Gen5detect review is a case in point. The Samsung Jet 95S, announced earlier in 2026, also shares the same suction spec, but costs a fraction of the Dyson's RRP, and that wasn't the only pleasant surprise it came with. It began to impress even before I took it out of its packaging.

The box that was delivered to my door was much lighter than what I've experienced with other cordless vacuums recently, so much so that I thought it was surely missing parts. Once opened up, I didn't even need to glance at the user manual to put the free-standing dock together and assemble the vacuum — surprisingly very intuitive! And the fully assembled machine looked so much more compact that my Dyson V15s Detect Submarine hanging off its Free-Dok.

Well, 'compact' may not be the right word, but it's definitely shorter — about half the height of the aforementioned Dyson, but that's because the V15 hangs at a height. The battery pack, however, adds weight to the otherwise light stick vacuum, albeit the Jet 95S is still lighter than some of the newer Dyson's I've tested — tipping the scales at about 2.69kg with the heavier Jet Dual Brush+ floorhead compared to about 3.6kg for the Gen5detect.

Samsung Jet 95S on its stand beside the Dyson V15 Detect Submarine

A little more compact than a Dyson (right), the Samsung Jet 95S (left) is rather unassuming (Image credit: Sharmishta Sarkar / TechRadar)

Then there's the suction power which, as I've already mentioned, puts it in the same league as the Dyson Gen5detect, a stick vac that I'd readily recommend for its power. As good as the Dyson is, the Jet 95S can more than match that performance, even outdoing its more expensive competition in some of my tests, whether that's on hard floors or carpet. For example, where the Gen5detect might need two passes to suck up entangled hair from carpet fibres even in its Boost mode (maximum suction), the Jet 95S can manage it in one in its Jet mode.

And therein lies another point of difference that's impressive: where you typically get only three suction settings on most cordless vacuums, there are four on the Jet 95S, and even the lowest is better than Dyson's Eco mode.

While I can't fault its cleaning prowess, I found the main floorhead — the Jet Dual Brush+ — to lack easy manoeuvrability, even on hard floors, which means you're exerting extra energy to get the machine around your floors. That's not the case with the Slim LED brush, though, but that's designed for hard floors only and for squeezing under low-lying furniture.

The most surprising thing about the Samsung Jet 95S, however, is how much value it offers. For about half the price of the Gen5detect's RRP, you're getting the exact same suction and arguably better performance, in a more compact (and slightly lighter) setup, and no shortage of additional attachments. You even get a telescopic tube that you won't get with any current Dyson.

And while you can buy a Shark vacuum for less money, none offer the same kind of performance. So, in all honestly, it doesn't bother me that there's no additional perks here, like self-emptying or a mop attachment — the Jet 95S already packs in plenty of bang for your hard-earned buck.

Samsung Jet 95S being held over a colourful rug

(Image credit: Sharmishta Sarkar / TechRadar)

Samsung Jet 95S review: price & availability

  • Currently only listed on the Samsung Australia and New Zealand sites
  • While NZ has no RRP listed, it's AU$799 in Australia
  • Also available from authorised third-party retailers

Announced in March 2026, the Samsung Jet 95S costs AU$799 in Australia and is available to buy directly from Samsung or from select third-party retailers like The Good Guys and JB Hi-Fi.

It's also listed on the Samsung NZ site, but no price is mentioned, although third-party retailers have the Jet 95S listed for NZ$919.

Compared to some Shark cordless vacuums that are constantly discounted on, say, Amazon, this price does seem high, but it is, in fact, excellent value given its spec list and performance (as you will read in more detail below).

The similarly specced Dyson Gen5detect Absolute will set you back AU$1,549 at full price in Australia, but has been regularly discounted down to the AU$950 mark and it's still more expensive than the newer Samsung. Sadly, the Dyson seems to have been discontinued in New Zealand as it's no longer listed on the officially website.

While it might be cheaper to buy a Shark, especially since the Shark PowerDetect Clean & Empty can regularly be had for under AU$700 and it self-empties, its suction cannot match the Jet 95S.

• Value score: 5 / 5

A person using the Samsung Jet 95S stick vacuum on a colourful rug

(Image credit: Sharmishta Sarkar / TechRadar)

Samsung Jet 95S review: Specs

Weight:

2.5kg (with Slim LED Brush)

Dimensions:

25 x 93 x 20.2 cm

Filter:

HEPA filtration with pre-motor filter

Bin capacity:

0.8L

Max suction:

280AW

Max runtime:

60 minutes

Charge time:

210 minutes

Attachments:

Jet Dual Brush+, Slim LED Brush, Pet Tool+, Combination and Long Reach Crevice Tool, Flex Tool

Samsung Jet 95S review: Design

  • Waist-high free-standing dock with integrated storage
  • Expandable and bendable wand; comes with several useful attachments
  • Lighter than many modern cordless vacuums, but not quite lightweight

As I've already mentioned, when the Samsung Jet 95S got delivered to my home, I honestly thought the box was missing parts because it was so much lighter than what I'd expected it would be. That was unfounded because everything was neatly packed away inside and it only took a glance at the individual parts to know exactly how they all slotted into place to assemble the Jet Standing Station (as Samsung calls the free-standing dock) and the stick vacuum itself.

Fully assembled, the stand with the machine is barely waist-high — well, it is for me and I'm only five-feet tall! And that gives the whole package a very compact feel compared to newer Dysons hanging off the British brand's Free-Dok. And even though the Jet 95S uses about the same amount floor space as the Dyson, it doesn't feel... imposing.

The heaviest bits are the base for the Jet Standing Station and the removable battery pack, with the latter making what is a very lightweight stick vacuum relatively heavy and slightly less unwieldy than some compact Shark vacuums I've previously tried. That, however, is an issue with all newer cordless vacuums with removable battery packs, so I can't quite blame Samsung for it. Despite the battery, though, the Jet 95S is still lighter than the Dyson V15 Detect or newer models, tipping the scales at 2.69kg with the Jet Dual Brush+ affixed to the wand (it's about 2.5kg with the Slim LED floorhead).

Samsung Jet 95S on its stand

(Image credit: Sharmishta Sarkar / TechRadar)

Speaking of attachments: there are three motorised tools — the aforementioned Jet Dual Brush+ for carpets and hard floors alike, the Slim LED Brush for hard floors only and the Pet Tool+ for sucking up finer and shorter strands — as well three non-motorised options that include a crevice tool, dusting brush and a bendy attachment. The last tool is can be handy when you need to reach some awkward spots when using the Jet 95S in handheld mode.

The wand is even expandable, with four height levels, meaning anyone — short or tall — will find a comfortable posture that won't strain your back while you move the Jet 95S around your home. As a short person, I didn't need to expand the tube at all, but a taller friend (standing 5'5") needed to increase the height by just one level to make it more comfortable to use.

Three non-motorised tools supplied with the Samsung Jet 95S
Sharmishta Sarkar / TechRadar
Samsung Jet 95S' Flex Tool bent in a person's hand
Sharmishta Sarkar / TechRadar

Maneuverability is a small issue with the Jet Dual Brush+ floorhead and, sadly, that's the one I found myself using the most in a test space with mixed floors (tiles in the living and dining area, carpet in the bedroom), just so I didn't have to keep swapping out the floorheads each time a did a full-house clean.

The Slim LED Brush, however, is easier to move on its little wheels, but the battery making the unit top heavy can feel like it's impeding smooth movement. That said, the Jet 95S is definitely easier on the wrist compared to Dyson's heavier models that weigh upwards of 3kg.

Samsung Jet 95S with Flex Tool bend 90º with crevice tool attached
Sharmishta Sarkar / TechRadar
Samsung Jet 95S dust canister
Sharmishta Sarkar / TechRadar
Samsung Jet 95S runtime displayed
Sharmishta Sarkar / TechRadar

I don't have pets, but the Pet Tool+ has been designed to pick up strands that are typically small and thin, and easily missed by the larger floorheads, but it can also be used on upholstery.

By far my favourite attachment has to be the Flex Tool, which allowed me to get into little nooks and crannies that a straight tube would typically not allow for. You can attach it to the handheld unit or to the end of the wand, then affix the crevice or dusting tool to get to hard-to-reach spots high or low. In my case, I was able to vacuum an air-conditioning vent's grill by bending the Flex Tool at a 90º angle and attaching the small brush to the end of it. I was also able to get behind my couch from the side (rather than reaching from over the backrest) to clean up months of dust along the skirting boards.

The Samsung Jet 95S Flex Tool and dusting brush against an air-conditioning vent

The Flex Tool can help you reach high or low spots that aren't always easy to get to (Image credit: Sharmishta Sarkar / TechRadar)

As with many cordless vacuums available now, there's a small LCD display that shows you the suction setting and the time remaining for the chosen mode, but you don't get a breakdown of dust sizes and amounts like you do on a Dyson or even the Dreame Z50. The information on screen might be minimal, but I can't complain given how much it costs.

One design aspect that I'm still unsure about is the onboard dust canister. I was expecting it to have a bottom trapdoor that would open on the press of a button to empty (like a Dyson's bin), but that's not the case. I had to detach it from the handle, remove the filter and internal metal cylinder, then tip the canister over to empty it. It's not a difficult process, but I think I'd much prefer the Dyson method of emptying, with the option to dismantle the canister for a thorough clean every once in a while.

• Design score: 4 / 5

The dismantled dust canister on the Samsung Jet 95S
Sharmishta Sarkar / TechRadar
The inner cylinder of the Samsung Jet 95S dust canister
Sharmishta Sarkar / TechRadar
A person emptying the dust canister of the Samsung Jet 95S
Sharmishta Sarkar / TechRadar

Samsung Jet 95S review: Features

  • No SmartThings support and it's definitely not necessary
  • Smart Motion is a thoughtful feature, but ultimately superfluous
  • Not necessarily a quiet vacuum

The 280AW of suction might be the headline act here, but one way Samsung has kept costs down is by not adding SmartThings support here like it has for its Bespoke Jet range. Which also means the Jet 95S doesn't use Samsung's Clean Station, but I don't mind that at all, especially at its price point. And, honestly, I didn't see the need for SmartThings support in any of the Samsung vacuums I've tested (stick or robot) and the Jet 95S makes an excellent case for not needing superfluous features.

Speaking of which, there is one feature that seemingly adds value but, ultimately, ended up being something I didn't ever need to use. It's called Smart Motion and it kicks in automatically when the vacuum is left switched on but at rest — like leaning against a sofa or chair — in case you need to, say, answer the door or move a cable from the vacuum's path. It will shut down completely when still and restart automatically if you move it within a minute.

Samsung Jet 95S leaning against a sofa beside the Dyson V15 Detect Submarine

Without the wand being extended, the Samsung Jet 95S (right) is shorter than the Dyson V15 Detect Submarine (left) (Image credit: Sharmishta Sarkar / TechRadar)

Given the power and mode buttons are so well within reach of the thumb, I found I was just switching the vacuum off if I needed to set it aside for a minute or two. And given its novelty, most users will likely even forget the feature exists. However, for those who are wont to just leave their vacuum idling against a chair or table, the Smart Motion feature will kick in and help conserve some battery life.

Dynamic suction is available, of course, which means you can just keep using the Jet 95S at its default setting (Mid) and let it do its thing. It's not really quiet, though, hitting about 89dB in the Jet mode in the Decibel X app on my iPhone in an otherwise silent room.

• Features score: 4 / 5

Samsung Jet 95S display showing runtime

(Image credit: Sharmishta Sarkar / TechRadar)

Samsung Jet 95S review: Performance

  • Excellent and quick vacuuming on hard floors and carpets in all settings
  • Most messes can be cleaned in a single forward motion
  • No loss of suction on either floorhead even when pulling the vacuum back

Samsung really knows how to optimise suction power to the best effect — it did it with the Bespoke range of cordless vacuums where I said the suction lived up to its 'Jet' name in my Samsung Bespoke Jet review. The South Korean electronics giant has done it again with the cheaper Jet 95S, taking full advantage of the airflow moving with up to 280AW (Airwatts) of power.

As I've already said, that's the same amount of suction the Dyson Gen5detect boasts, although it's not industry-leading. The Dyson V16 Piston Animal has 315AW while the Dreame Z50 Station goes further with 330AW, and Samsung's own Bespoke Jet Ultra offers 400AW. It's not about the number, though as, ultimately, it's the air flowing through the machine that will determine how well the vacuum functions — and the Jet 95S performs remarkably well.

The Min suction setting displayed on the Samsung Jet 95S screen
Sharmishta Sarkar / TechRadar
The Mid suction setting displayed on the Samsung Jet 95S screen
Sharmishta Sarkar / TechRadar
The Max suction setting displayed on the Samsung Jet 95S screen
Sharmishta Sarkar / TechRadar
The Jet suction setting displayed on the Samsung Jet 95S screen
Sharmishta Sarkar / TechRadar

With four suction modes at your fingertips (literally) — Min, Mid, Max and Jet — I found that the default setting of Mid was the best option and was happy to leave it as such for all my tests and regular cleaning. This mode adjusts suction automatically, whether that's when it detects different floor types or detects excess dirt.

Regular daily cleaning jobs were a walk in the park for the Samsung, sucking up visible dust, debris and hair even on the lowest (Min) suction setting on hard floors. It took a Mid setting on a very dirty carpet (covered in crumbs and hair) for it to get clean, but without having to repeatedly go over the same spot — just one or two passes were enough.

Samsung Jet 95S cleaning a mixture of debris on tiles
Sharmishta Sarkar / TechRadar
Samsung Jet 95S cleaning a patch of dry debris on tiles
Sharmishta Sarkar / TechRadar

To put the Jet 95S through more serious testing, I used it to clean up a thick layer of coffee grounds and a mixture of oats, chia seeds, tea from a tea bag and freeze-dried raspberries — between them, they indicate a variety of dust and debris sizes that a typical household would need cleaning up.

Samsung Jet 95S cleaning coffee grounds on tiles
Sharmishta Sarkar / TechRadar
Samsung Jet 95S cleaning a patch of coffee grounds on tiles
Sharmishta Sarkar / TechRadar
Samsung Jet 95S cleaning coffee grounds on tiles
Sharmishta Sarkar / TechRadar

On hard floors in my test space (matte-finish tiles) and set to the default Mid suction mode, the coffee grounds were sucked up in a single movement — forward to clear the middle of the dirty patch and back again to suck up another strip.

I was expecting it to take a full front-and-back pass to clear out the mixture but, again, it surprised me by picking up different-sized dirt in just a single forward motion, leaving a clean strip of floor in the middle of the patch. I noticed no scattering when larger particles hit the plastic frame of the floorhead either, which makes cleaning even easier.

Samsung Jet 95S cleaning debris on carpet
Sharmishta Sarkar / TechRadar
Samsung Jet 95S cleaning a carpet
Sharmishta Sarkar / TechRadar
Samsung Jet 95S cleaning carpet
Sharmishta Sarkar / TechRadar

The same mix of oats, tea dust, chia seeds and fruit on carpet gave the Jet 95S a little more of a challenge, but that translates to needing a forward and backward pass to clear a strip (as compared to just a front swipe on hard floors).

Step it up a notch and both the Max and Jet settings can blow any of the competition out of the park. My biggest pet peeve is hair strands getting entangled in carpet fibres that don't necessarily come off even when vacuuming on, say, Dyson's Boost mode or the highest suction on a Shark, but I found 100% hair pickup during my testing of the Jet 95S. I also found no tangling within any of the motorised attachments.

• Performance score: 5 / 5

Charing status and battery level on the Samsung Jet 95S

(Image credit: Sharmishta Sarkar / TechRadar)

Samsung Jet 95S review: Battery life

  • Maximum runtime of 60 minutes with non-motorised tools
  • Quite average battery life with motorised floorheads
  • Relatively quick recharge time, with handy battery life indicator

Battery performance, however, is quite average, with Samsung rating it for a maximum runtime of 60 minutes with the non-motorised attachments. That almost tracks, with my tests giving me 56 minutes on the Min mode (lowest suction) when the crevice tool was attached to the handheld unit.

With the motorised Jet Dual Brush+ floorhead and using the default Mid suction setting, I maximum I was able to eke out on a relatively clean floor was 37 minutes. This number will vary depending on how often dynamic suction kicks in, but it's not bad at all and quite competitive with other brands.

Move it up to Max and a full charge got me 10 minutes with the Jet Dual Brush+, while Jet barely give me 7 minutes. Again, it's on par with what I've previously experienced with Dyson and Shark alternatives.

A timer countdown on the Samsung Jet 95S screen
Sharmishta Sarkar / TechRadar
The battery level displayed on the Samsung Jet 95S with a red indicator light
Sharmishta Sarkar / TechRadar

Like I've previously mentioned, the Smart Motion feature might help some users conserve a little battery life but, in my opinion, it's neither here nor there and superfluous.

The Jet 95S took about 3 hours to top up from 21% to full, which is relatively quick compared to Dysons that offer the same 60-minute runtime (which average around the 4-hour mark), but I love that there's an indicator light above the handle that changes colour while it's charging.

It follows the traffic-light system where it's red when levels are low, yellow (more like orange) when it's come up to mid levels and green when it's fully done. This visual indication is handy when you need to complete a job in a larger home and don't necessarily need to wait for a full recharge.

• Battery score: 4.5 / 5

Samsung Jet 95S with Slim LED Brush and headlight

(Image credit: Sharmishta Sarkar / TechRadar)

Should I buy the Samsung Jet 95S?

Attributes

Notes

Score

Value

It's very well priced for the kind of performance it offers.

5 / 5

Design

It may not stand out from a design perspective, but its compact, unimposing and has plenty of features to suit any user.

4 / 5

Features

It doesn't offer much that's different, and the one feature it does is, ultimately, superfluous.

4 / 5

Performance

It might come across as a no-frills stick vacuum, but it cleans remarkably well and can outperform even more expensive models.

5 / 5

Battery

Quite standard in terms of runtime, and that's absolutely fine at its price point.

4.5 / 5

Buy it if...

Value for money is priority when buying a cordless vacuum

Vacuums are frequently discounted, so you can always get a Dyson or Shark for cheaper than what the Jet 95S costs, but factor in its cleaning performance and the Samsung wins hands down.

You want a powerful vacuum cleaner

It may not match the suction of some other models on the market, but 280AW is still plenty and Samsung puts it to very good use here.

You regularly need a handheld vacuum

It's not especially light, but it's still easier to use in handheld mode than some of its competition. Moreover, the Flex Tool adds versatility to help you reach awkward spots and angles.

Don't buy it if...

You want a tech-laden vacuum

From a features point of view, the Jet 95S comes across as a no-frills option, so if you're after some smart tech, you'll need to look elsewhere... and spend more.

You want a mop attachment as well

There are plenty of alternatives that ship with a mopping floorhead, or you can opt for a robot vacuum, but the Jet 95S misses out.

You prefer to not clean the dust canister yourself

If self-emptying is a key criterion for choosing a stick vac, you'll need to look elsewhere.

Also consider

I might have scored the Samsung Jet 95S full marks, and I'd easily recommend it over anything else I've personally tested, but it's always good to have options. If you'd like a few alternatives, I've listed a few below at different price points for you to consider.

Shark PowerDetect Clean & Empty

It might have lower suction power than the Samsung Jet 95S, but it still cleans well and comes with an auto-empty charging dock that doesn't even need replacement bags. And while it's more expensive at full price than the Samsung, it's regularly discounted to below the AU$700 / NZ$800 mark.
Read our full Shark PowerDetect Cordless review, which is the non-emptying version.

Dyson Gen5detect Absolute

With the exact same suction and very good overall performance, this Dyson is packed with some sensible tech you won't find on the Jet 95S. However, it can be expensive, even when discounted, and it seems to have discontinued in New Zealand.
Read my in-depth Dyson Gen5detect review for more information

Samsung Bespoke Jet AI

I'm a little partial to the overall design of Samsung's Bespoke Jet vacuums and the Clean Station is one of the best self-emptying charging docks I've tried. The Lite models get you the same 280AW of suction, but the Ultra scores you 400AW, but they also cost more than the Jet 95S. Moreover, the AI part is basically market-speak for dynamic suction, but they all clean very well.
Read our full Samsung Bespoke Jet AI review to learn more

How I tested the Samsung Jet 95S

A person holding the Samsung Jet 95S in front of a chair

(Image credit: Sharmishta Sarkar / TechRadar)

I used the Samsung Jet 95S in my own one-bedroom apartment for about two months, cleaning every 2-3 days. However, I did put it through TechRadar's standard tests by sprinkling oats and tea dust from a tea bag. Additionally, I also created mixtures with chia seeds and pieces of freeze-dried raspberries to emulate different debris sizes that a standard home might encounter. This mixture was used on both hard floor — matte tiles in this case — and a mid-pile carpet.

Separately, I even vacuumed a handful of coffee grounds from tiles for additional testing.

To test its hair pickup, I collected my own strands from my brush and scattered them over the mid-pile carpet in the bedroom and walked over them for a couple of days to ensure they were well embedded into the fibres. I also scattered some breadcrumbs and biscuit crumbs on the same carpet, allowing them to also sink in over a couple of days.

Thankfully the Samsung Jet 95S was able to suck them all up and leave the floors in my home clean.

Read more about how we test vacuums

[First published August 2026]

The 78.4 kWh Base Core battery can keep your home running during an outage, installs in under an hour, and gives back to the grid — as home battery installations reach a record high

  • Base Power raises funds to roll out a new Base Core model
  • It protects against power outages and gives back to the grid
  • The battery is available to purchase in Texas and Illinois initially

What with plug-in home solar becoming more widely available and household battery power storage increasingly common, there's growing momentum behind home energy solutions that help to lower electricity bills and reduce pressure on the grid.

There's more evidence with the news that Base Power just raised a cool $1 billion to scale its large Base Core home battery (via Interesting Engineering): the battery is available in 39.2 kWh and 78.4 kWh versions, and while it's capable of keeping your home running during power outages, it does a lot more besides too.

Base Power says the Core can be installed in under an hour, can be switched to seamlessly, and will handle extreme weather events too (it works in temperatures of -22 to 122°F or -30 to 50°C). If the standard power network goes out, the Base Core can keep your home running for 36-72 hours depending on capacity and configuration.

When the power's not out, the Base Core can still reduce your reliance on the grid and cut down on electricity bills. It's also designed to support the grid, feeding back electricity when additional capacity is needed (though there will always be some in reserve for you). That helps to keep up-front costs down.

Texas and beyond

Today, we're launching Base Core, our own battery designed & built in Texas, and announcing our $1B Series D to bring it to homes across the country.Three years ago, we started Base with a belief that batteries were the unlock to energy abundance. We saw battery storage as the… pic.twitter.com/3rjG59wZvEAugust 3, 2026

The Base Core is now available in Texas and Illinois, with pricing dependent on your utility provider. A typical cost listed on the Base Power website is energy for 13.1¢ cents per kWh, a membership fee of $19 per month, and a $695 up-front cost for the battery.

As more of these batteries are installed, the better the system will work, in theory. Base Power says it's installed battery capacity has grown to more than 500 MWh over the past year, while more partnerships are being signed with electricity companies. After this latest funding round, the company is valued at $13 billion.

There certainly seems to be the demand for these money-saving, energy-storing batteries: last month Ars Technica reported that US home battery installations had hit a new high for the first quarter of 2026, with new units accounting for 673 megawatts of energy supply. For the same quarter, around 1,300 MWh was installed in terms of capacity.

Google has also invested in the idea of tapping into distributed household energy systems, via a deal with Voltus, in part to manage the growing demands of its AI data centers. For home users, the benefits are clear: protection against both rising electricity prices and an increasing number of power outages in vulnerable areas.

With plug-in batteries also on the road to legalization in some countries, it does feel like a home energy boom is coming – and that could help us all navigate the energy crisis and our soaring bills.

Philips Hue may be bringing its best ever lightstrip to the back of your TV —but we're primed for a painful price

  • Philips Hue accidentally leaked a new Pro TV lightstrip on its own website
  • There are no details of its price or release date yet
  • A new Philips Hue Play Sync camera is expected to launch soon

I love Philips Hue lights, and I particularly love Hue lightstrips — so I'm excited by an accidental leak that indicates a new Pro lightstrip is coming to your TV.

The leak was spotted by the excellent Hueblog, who discovered the following text on the US Hue website: "Check out Philips Hue Play gradient strip lights and Play gradient strip light pro." There isn't currently a gradient strip with the 'pro' suffix, so this appears to be a new product that's coming very soon.

I hope so, although I worry about the "pro" bit because that usually indicates a premium price. But if it uses the same tech as the spectacular Hue Omniglow lighting strip I reviewed earlier this year, it could be a stunning addition to your home cinema or gaming setup.

Hue Omniglow Lightstrip draped over some guitar hangers in a dark room

Unlike other Hue lightstrips, the Omniglow delivers seamless gradients where individual LEDs aren't obvious. (Image credit: Future)

Philips Hue Play Gradient Strip Light Pro: what to expect

The Philips Hue Play system synchronizes your smart lights and bulbs, enabling you to change the lighting with music or to reflect what's going on in a game, TV show or movie. The Gradient Strip Light models are designed to go on the back of your TV and deliver a similar experience to an Ambilight TV, extending the colours from your screen onto the walls and ceiling.

I'm a huge fan of Hue Play – I've been using it since the first-gen Play Sync box was released in 2019 – but the individual LEDs are very visible. If the Pro version were to be closer to the Omniglow, which delivers seamless gradients without the LEDs being visible individually, that would be a great upgrade. Although I suspect it's likely to be pricey too: the Omniglow has an RRP of $139.99 / £119.99 / AU$279.99 for the 3m model.

At the moment details are non-existent, but we do know that Hue is getting some more Hue Play products imminently: the Hue Play Screen Sync TV camera is expected to launch very soon as a more affordable alternative to the clever but expensive Hue Play HDMI Sync Box 8K. As with the Sync Box it'll mirror your display to your smart lights and bulbs, but you won't need to connect any devices to do it as it'll simply watch what's on the TV.

Panasonic's new gadget is a bread maker that also churns ice cream — I went hands-on with the wild two-in-one appliance, and the results were seriously tasty

Shrinking kitchens in modern homes mean appliances are working harder than ever to earn a place on your counter. It's not unreasonable to expect your blender to double as a food processor, or your microwaves that moonlight as air fryers are now commonplace. Panasonic, however, has combined two gadgets I never thought I’d see wed: a bread machine and an ice cream maker.

I traveled to Sauce, a cooking school at the Langham Hotel in London, to get hands-on with the new Panasonic Mini Bread and Ice Cream Maker, plus a selection of other multi-talented appliances. I tied on my apron alongside a mix of journalists, influencers, and (unusually for this sort of event) their family members — including several young kids.

All the dishes on the menu combined to make a meal for a family to enjoy together without having to adapt elements, or cook separate things for children — and the recipes were so straightforward even the little ones could help out (with the assistance of a step stool).

First, we saw a demonstration of the intriguing bread and ice cream machine, then got to grips with it ourselves. When I first received details of the event, I assumed these were separate appliances and that the invitation contained a typo, but no, this compact device can indeed do both. It makes some sense when you think about it — bread requires kneading, and ice cream needs churning, which are very similar mechanically — so why not?

Woman preparing ice cream to freeze using Panasonic bread and ice cream maker

Making ice cream is simple — just freeze the bowl and insert it into the machine, pour in your mixed ingredients, and let it get to work (Image credit: Future)

As with most bread makers, preparing a loaf is a simple matter of pouring your ingredients into the machine, selecting a program, and then leaving it to handle the requisite kneading, proving, and baking.

The particular loaf we made was enriched with butter (thereby increasing the proof time), and studded with mixed seeds. Since we only had a few hours, we didn’t get to see our own loaves through to completion, but there were several finished examples available to try, and they were delicious spread with a little butter — crusts crisp and centers springy.

Did you know TechRadar now has membership?

Various tech product cutouts next to the words 'Insider TechRadar Learn More'

(Image credit: Future)

Become a TechRadar Insider by simply clicking 'Join Now' at the top of this page. Have a question? Please email membership@techradar.com

We then saw a demo of the ice cream making process, which starts with chilling the two-in-one machine’s churning bowl in the freezer for at least eight hours. When the bowl is frozen, remove the bread tin from the machine, slot in an adapter, and then simply place the ice cream bowl on top. Pour in your prepared ingredients, hit the button on the control panel, then close the lid and let the machine handle the rest.

The result was light and flavorful (and we were advised that if you’re not vegetarian, adding a little gelatin to your ice cream mix will give an even creamier texture). The frozen yogurt was a particular winner, and a welcome treat on a hot summer day, and one you can prepare in a couple of minutes provided the bowl is frozen ahead of time. Want something fruity? You can make your own compote to swirl into the mix, or just add a spoonful of jam.

Baked cheesecake ingredients with silicone mold

Pour the blended ingredients into a mold, add berries, pop in the combi microwave, and a few minutes later you'll have a delicious baked mini cheesecake (Image credit: Future)

Next, we got stuck into some hands-on cooking with a Panasonic 4-in-1 Air Fryer Combi Microwave Oven. Despite looking no larger than a standard microwave, this appliance also serves as a convection oven and air fryer, and is packed with preset programs that combine these different cooking methods.

It’s a bit of a cliché to say that a multi-purpose appliance could replace your conventional oven, but with its tiered trays and large capacity, I think this one genuinely might for smaller families.

Of the two recipes we tried in the Combi Microwave, my personal favorite was a miniature baked cheesecake — just the right size for a snack or small dessert. You could even devour it during your morning commute if you didn’t have time for breakfast, and make yourself the envy of your fellow travelers.

The basic ingredients had already been blended together before we arrived (using a Panasonic blender, naturally), but I was very pleased to realize that they included banana. If you’re anything like me, you have a frankly ridiculous stash of overripe bananas in your freezer, and cheesecake is a very welcome change from banana bread.

Crispy chicken, avocado salad, and rice on plate with knife and fork

Cornflake baked chicken is a quick and easy meal for kids and adults (Image credit: Future)

All we had to do was pour the mix into the molds, add a scattering of fresh berries, and pop them in the combi microwave for a few minutes. The finished cheesecakes were delicious — perfectly set, finished much faster than you could manage in a regular fan oven, and with a lightly caramelized top that you couldn’t achieve in a standard microwave.

I will definitely try them again — I don’t have bar-shaped molds, but I do have a set of silicone muffin cases that could serve the same purpose.

Katsu-style cornflake baked fried chicken was next on the menu, made using fresh chicken breast coated in well-seasoned buttermilk and egg, then covered in a mixture of crushed cornflakes and flour (again, with plenty of seasoning). We arranged the coated chicken pieces on the microwave’s crisper plate, and within a few minutes they were cooked through without being dry in the center, and deliciously crisp outside, all with no added fat.

They were perfect alongside a freshly-cut salad, and rice prepared using Panasonic’s new multi-cooker. Rice cookers have been quietly finding their way into more and more kitchens over the last couple of years (and we’ve started reviewing more of them here on TechRadar), so it makes sense that Panasonic is launching a new model in the UK soon as well — with Fuzzy Logic Technology that adjusts cooking on the fly.

Panasonic bread maker with ingredients

(Image credit: Future)

It’s hard to choose a favorite, but ultimately I think the bread and ice cream machine was my top pick of the appliances we tested. It’s just such an unusual combination — and better yet, I learned it includes a mochi paddle so you can make your own chewy and delicious treats filled with ice cream or red bean paste. All that, plus freshly made, crusty bread? I’m sure I can find a little extra space on my kitchen counter…

Solar energy just had its best-ever month in the UK — as the first plug-in solar kits prepare to go on sale within weeks

  • Solar energy just had its best-ever month in the UK
  • Rooftop panels and farms provided 14.4% of the country's electricity
  • The record comes ahead of the legalisation of plug-in solar kits soon

Our gardens may be wilting in this exceptionally dry, sunny summer in the UK, but one thing that is benefitting from all the rays is solar panels. Solar energy just had its best-ever month for supplying power to the grid — and plug-in solar panels are aiming to keep that run going when they become legal later this month.

Alongside solar farms, rooftop panels — which are surging in popularity — helped provide an impressive 14.4% of the UK's electricity in July (via The Guardian). That's 50% more than this time last year, according to National Energy System Operator (Neso) data, and helped to power the fans and air con units we're all relying on to survive while working from home.

The record comes from a combination of two factors. The incredible amount of sunshine we saw in July helped — the UK bathed in around twice the amount of sunshine hours that it usually gets on average at this time of year.

But it was also powered by the popularity of solar panels, which many are installing to help cut their energy bills in the UK. The country saw more solar power installations in the first half of 2026 than in any similar period for 15 years, while last year saw the highest total number of solar installations (269,000) ever recorded in a calendar year, according to government data.

Those figures include ground-based solar farms, but a significant proportion (just under a third of the UK's total solar power) is provided by rooftop panels. However, with these panels still prohibitively expensive for many, eyes will now be turning to the legalisation of plug-in solar kits from August 27.

Can plug-in solar add some extra shine?

A balcony solar panel

(Image credit: Getty Images / Sean Gallup)

It's unfortunate that plug-in solar panels weren't legalised a few months ago, when they could have contributed to these record UK solar energy figures.

Still, the UK government made the welcome announcement last week that these plug-in solar kits — which can send electricity into your wall socket without needing professional installation — will become legal from August 27. That's good news if you've felt frozen out of solar due to its cost, a lack of roof access or the fact that you're renting.

The Statutory Instrument 2026/848 clears the blocks that previously prevented UK residents from buying self-installed, ‘plug-in’ solar systems. The August 27 date is more of a legal landmark, so it isn't clear exactly when these kits will go on sale. But you can expect to see them in the likes of Lidl, Currys and Amazon soon, when they'll apparently cost around £400 and could save households up to £70-£110 a year.

While many have argued that plug-in batteries could be the real home energy revolution (they were left out of the government's new legislation), the combination of this new solar energy record and the legalisation of plug-in solar kits later this month means that renewable energy is having a big moment.

"Fifteen years ago, solar energy was a footnote in the electricity mix," said Chris Hewett (Chief executive of Solar Energy UK). "Now it is a major player, delivering homegrown, cheap, clean and reliable energy."

“The UK is firmly in its second solar boom, joining the trend we’re seeing worldwide, as households and governments look to it as a low-cost and local alternative to oil and gas,” added Frankie Mayo, a senior analyst at Ember.

The UK is still well behind Germany when it comes to balcony solar (which is called 'Balkonkraftwerk'), as you can see in the graph above, but at least the country's sun-powered potential is now finally on the charge.

I've used the Dyson V15 Detect for two years, and although it's not perfect, I'd still recommend it over a Shark — here's why

During my years as a TechRadar Homes Editor, I tested an awful lot of vacuums. But the one that's been my constant companion throughout has been the Dyson V15 Detect. It's not a review sample — my partner bought it, and it's the vacuum we've been using at home for the past 21-plus months. It's been used to clean hard tile floors, carpets, lots of stairs, and a whole heap of dog hair.

The V15 is not the newest Dyson vacuum. It came out in 2021 and there are now two newer flagship models: the Gen5detect (launched 2022) and the V16 Piston Animal (2025). However, despite not being the latest-and-greatest, it's still the model that sits atop our best Dyson vacuum guide.

So after nearly two years of regular cleaning with the V15, would I still recommend it? How does it match up against the rest of the best cordless vacuums on the market — and specifically, the newest models from Dyson's great competitor, Shark? Here's my long-term review.

Smooth mover

Let's start with what I love about our Dyson dust-sucker. The suction is excellent, and the Auto mode (where the suction will increase or decrease depending on how much dirt is detected on the floor) is a very welcome addition. I use this mode almost exclusively, and it can be relied upon to do a thorough job of clearing whatever debris has gathered on the floor. I haven't noticed a drop in cleaning performance over our two years of use.

The V15 is also extremely easy to maneuver. Our home has lots of stairs, and plenty of nooks and crannies where dust and hair like to collect and lurk, and the V15 Detect does a great job of getting into all of them. I love how easily and smoothly the head pivots, and the fact it can lie completely flat to the ground for cleaning under beds.

Many of the newest Shark vacuums have a hinge on the vacuum wand, which enables it to bend forwards for cleaning under furniture. It works well, but adds bulk to the wand, and the whole thing is slightly unwieldy in its folded state. For my home, the Dyson setup works perfectly well, but if you're lacking in maneuvering room, perhaps Shark's 'MultiFlex' / 'Flexology' solution would be a better fit.

The new thinner and integrated crevice tool of the Dyson Gen5 Detect

The hidden crevice tool is a lifesaver in my tall home (Image credit: TechRadar / Sharmishta Sarkar)

I'm also a huge fan of the Dyson V15's secret crevice tool. It's hidden in the wand, so I'm never without it. Our house is tall and thin, with four floors, and this built-in tool means that if I spot a dusty corner at the top of the house, I don't have to traipse all the way down to the utility room to fetch a detail tool to deal with it. As far as I'm aware, this feature is exclusive to Dyson at the moment.

Having tested a number of vacuums from Dyson and various other brands, I'm always struck by how consistently high quality and well-built the Dyson vacs feel. There's a strong attention to detail in the design, and they feel sturdy and reliable. That's still true of the V15 after nearly two years of use.

Lasers and data

Now on to a couple of features that have divided opinion within my household. The V15 comes with a couple of different floorheads: the Digital motorbar head, which has bristles and is designed for use on any floor type, and the Fluffy optic head, which is entirely soft and built for use on hard flooring. The latter is equipped with a green light to illuminate dust.

Dyson V15 Detect

I love using the light on the soft floorhead to chase down dust bunnies (Image credit: Future)

I'm very on board with the Fluffy floorhead. I love that it feels gentle on our tiled kitchen floor (and doesn't clatter over it as most vacuum cleaner heads will), and I appreciate the way the light draws attention to dust and hair lurking in dingy corners. I find it very satisfying to then whisk that dust away, and always feel I'm getting a far more thorough clean than I would without this feature.

However, my partner is not so enamored with the Fluffy floorhead. He feels the Digital motorbar floorhead works perfectly well on hard floors, and it's not worth the hassle of swapping the heads over.

Close up of info screen on Gen5detect vacuum showing summary of particles sucked up

Both the V15 and the Gen5detect (pictured) have real-time dust reports (Image credit: Future)

Then there are the real-time dust reports on the screen. I find these endlessly fascinating, and I enjoy seeing the dust hotspots causing the bar graphs to spike. However, when I asked my partner for his thoughts, it became clear that not only was he not paying them any attention, but he didn't really know what they were. Is is possible the general public is just not as invested in the intricacies of vacuum cleaning as I am? Maybe.

Bulking up

Moving on to the down-sides of the V15. The most significant complaint I have with it is that V15 Detect is that it's pretty heavy. Further to that, the weight is concentrated in the main motor section, which itself is rather elongated in shape. That makes it rather unwieldy, and especially when used in handheld mode.

Dyson V15 Detect vs Gen5detect vacuum cleaners

The V15 (background) and newer Dyson vacuums have a rather heavy, elongated motor section, which can make them a little awkward to use (Image credit: Future)

All of Dyson's newer vacuums (I'd say from this model onwards — so the V15, the Gen5detect and the V16 Piston Animal) suffer from this weight distribution issue.

Looking to Shark's range, the fancier models, such as the PowerDetect Cordless, are actually heavier overall. However, the motor/handle section is more squat in shape, and there's more weight through the wand and into the floorhead. That means more even weight distribution, which can make for a more comfortable vacuuming experience.

A triggering issue

Another big complaint I have with the V15 is that it's trigger-operated, with no option to lock it for continual running. I find that irritating when I'm using the vacuum for long periods, or trying to get into awkward corners while keeping the trigger compressed.

I prefer the setup on Dyson's newer models, where there's a one-press power button. However, that's still not perfect — it requires you to have a hand free to turn the machine on and off, because the power button is not reachable from your holding hand.

Most modern Shark models use button operation, and just like the Dyson designs, you can't reach the button from your holding hand. My ideal design is one where the vacuum is trigger-operated but with a lock for continual running. No Dyson vacuum has this setup, and neither do any of Shark's newest stick vacs, although that brand's range is so sprawling you might find a trigger-plus-lock design somewhere.

Dyson V15 Detect vs Gen5detect vacuum cleaners

The V15 (foreground) switches on and off with a trigger on the handle — which can be frustrating when using it for longer cleaning sessions (Image credit: Future)

One comment that I hear sometimes about Dyson stick vacuums is that they don't always last as long as customers expect. Our V15 is still going strong after just under two years (which is actually at the lower end of how long cordless vacuums are meant to last, although most people would probably hope for longer).

Prior to that, my partner had a Dyson Cyclone V10, which lasted over five years. At that point the battery conked out, and replacing it only fixed the issue for a few months. I think that's a decent lifespan for a vacuum, but your mileage may vary.

Is it worth it?

After two years using my Dyson V15, I'd still recommend it. Its cleaning powers are excellent with no signs of fading, its special features genuinely useful, and I love how maneuverable it is.

I personally also prefer it to Shark's newest models. I cover my main thoughts on this in my Shark vs Dyson article, but as a short overview, it's special features feel superior — Dyson's laser lights are far more effective than Shark's headlamps, and its Auto mode feels more precise. The Dyson also pivots more smoothly and the overall design feels sleeker and more high-end.

However, it's not a clear-cut decision. The Shark PowerDetect Cordless offers the best outright cleaning performance of any vacuum I've used, including all the Dyson models. Shark's models also arguably deliver better value for money — although its higher-spec models still sit in the premium price tier.

The bottom line? After using the V15 for a couple of years, and testing multiple other vacs from different brands including Shark, I'm still something of a Dyson fan-girl. When our at-home vac finally bites the dust, we'll probably end up buying another Dyson, although I will still be checking out what Shark has to offer...

The fun-size Ninja Luxe Café Mini helps you brew tasty espresso and drip coffee if your kitchen isn't big enough for two separate machines

Ninja Luxe Café Mini Espresso Machine: two-minute review

The Ninja Luxe Café Mini Espresso Machine is a compact version of the Ninja Luxe Café. It doesn't require an enormous amount of counter space, especially considering that this single machine grinds your whole beans directly into your filter, weighs your grinds, brews your espresso or drip coffee, and froths your milk. You won't need any other coffee accoutrements on your counter.

While I did brew some absolutely delicious coffee with the Ninja Luxe Café Mini, there is definitely a learning curve. In fact, I wouldn't say I have mastered the espresso settings yet, even after brewing many cups. Even with the identical espresso settings, sometimes I get just an ounce or so and sometimes I get a lot more. Drip coffee comes out consistently well; no issues there. I also had some trouble frothing the milk; with just a minimum amount of milk in the jug it overflowed onto the counter.

Note that even though this is a semi-auto machine, you do need to have some manual strength and dexterity to get the portafilter properly into place. Be ready for some trial and error. If you're prepared to take on a project, I think you'll be well-rewarded for your efforts.

Ninja Luxe Café Mini Espresso Machine flat lay

(Image credit: Karen Freeman / Future)

Ninja Luxe Café Mini Espresso Machine: price and availability

  • Widely available both in store and online
  • Retails for $449.99 USD (£338.50 GBP, $643.73 AUD)
  • Only sold in the black and chrome colorway

You can find the Ninja Luxe Café Mini Espresso Machine at many brick and mortar stores and websites, including Amazon, Best Buy, Kohl's, Target, and Ninja's own site. It retails for $449.99 USD (£338.50 GBP, $643.73 AUD) and comes in just the one color, black and chrome.

Ninja Luxe Café Mini Espresso Machine ready to use

(Image credit: Karen Freeman / Future)

Ninja Luxe Café Mini Espresso Machine: specs

Name

Ninja Luxe Café Mini Espresso Machine

Type

Semi-automatic

Dimensions (L x W x H)

10.24 in L x 12.17 in W x 13.43 in H / 26.01 cm L x 30.91 cm W x 34.11 cm H

Weight

18.96 lbs / 8.6 kg

Brew styles

Espresso (double), Triple (espresso), Classic (coffee), Rich (coffee), and Over Ice (coffee)

Milk frother

Yes

Connected device

No

Ninja Luxe Café Mini Espresso Machine: design

  • Efficient design gives it a smaller footprint
  • Aesthetically pleasing, goes with any decor
  • Five brew styles

The Ninja Luxe Café Mini is efficiently designed to house everything you need to make just about any sort of coffee drink in a relatively small package. When you first unpack it, you will need to determine your water hardness with the enclosed test strip and set your machine accordingly. Run a flush cycle and then you're ready to start brewing.

The machine has a conical burr grinder, a brewing system that makes both espresso and coffee, and a steam wand. It comes with two filter baskets:, a smaller 'double' and a larger 'luxe' basket (unlike most espresso machines, there's no basket for pouring a single shot).

Place the basket into the portafilter, the funnel on top of that, and then slide it into the grinding cradle. Choose your brew style. The machine evaluates your beans and determines a recommended grind size. Turn the grind dial to meet the recommended number and hit the grind button.

Ninja Luxe Café Mini Espresso Machine grind button

(Image credit: Karen Freeman / Future)

Once your ground coffee is the basket, remove the portafilter and tamp down the grinds with the assisted tamper. It has a spring inside so you'll apply just the right amount of pressure.

Ninja Luxe Café Mini Espresso Machine tamping down grounds

(Image credit: Karen Freeman / Future)

Then you can remove the funnel, place the portafilter under the Ninja Luxe Café Mini's group head and turn it until it locks into place. This takes some manual strength and dexterity, and the machine's relatively light weight means you have to brace it in place so it doesn't slide around, though it does get easier with repeated use.

You can manually select your level of strength (represented by one, two, or three beans) and temperature or just use the default. When you're done brewing, dispose of the puck of used coffee grounds, and clean the dirty components.

Ninja Luxe Café Mini Espresso Machine

(Image credit: Karen Freeman / Future)

There is also a milk jug and steam wand. To use it, turn the manual valve on the side from brewing mode to frothing mode. The owner's manual includes detailed instructions of how to get the most froth from your milk of choice.

Ninja Luxe Café Mini Espresso Machine frothing milk

(Image credit: Karen Freeman / Future)

You'll need to clean the tamper, funnel, basket, portafilter, steam wand and jug after each use. You'll also need to empty and clean out the drip tray every few brews, and every time you froth milk. Additionally, you'll need to descale the machine periodically. However, there is no obvious way to get in and clean the grinder. That part never gets wet, but coffee oils will build up there over time.

  • Design score: 4.5/5

Ninja Luxe Café Mini Espresso Machine: performance

  • There is definitely a learning curve
  • You need manual strength and dexterity
  • Brew amounts are not consistent
Did you know TechRadar now has membership?

Various tech product cutouts next to the words 'Insider TechRadar Learn More'

(Image credit: Future)

Become a TechRadar Insider by simply clicking 'Join Now' at the top of this page. Have a question? Please email membership@techradar.com

Overall, I think you'll find that the Ninja Luxe Café Mini will make you some great coffee and espresso drinks. There's definitely a learning curve, but if you have the patience you'll figure it out. Of bigger concern was that sometimes the brewing seemed to just stop short of a full yield, and I'm not sure why. The same beans brewed at the same setting just didn't always yield the same size espresso. This only happened to me while brewing espresso; all three of the drip coffee settings yielded perfect results every time.

There are five different brew settings: Espresso (which is actually a double espresso), Triple (espresso), Classic (drip coffee), Rich (a richer drip coffee), and Over Ice (drip coffee brewed at a lower temperature). I tested all five of them multiple times.

Espresso

The smallest drink you can make is a double espresso, there is no single espresso setting on this machine. The owner's manual says to throw away the first espresso you brew each time you put new beans into the hopper because it takes a couple of brews for the machine to dial in correctly. I tasted it anyway and yes, you should toss it. After that first one, the espresso tasted good though sometimes it would randomly give me a shorter brew. I did notice that I consistently got a beautiful crema.

Ninja Luxe Café Mini Espresso Machine brewing espresso
Karen Freeman / Future
Ninja Luxe Café Mini Espresso Machine brewing espresso
Karen Freeman / Future
Ninja Luxe Café Mini Espresso Machine brewing espresso
Karen Freeman / Future
Ninja Luxe Café Mini Espresso Machine brewing espresso
Karen Freeman / Future
Ninja Luxe Café Mini Espresso Machine brewing espresso
Karen Freeman / Future

Triple espresso

The experience of brewing the triple espresso is just like brewing the regular (double) one, only you use the Luxe basket instead of the smaller one. Again, the machine would sometimes give me a tiny brew. Pictured below is one of the smaller triples; other times it was much larger. Otherwise, the espresso was good and always had a lovely crema.

Ninja Luxe Café Mini Espresso Machine triple espresso
Karen Freeman / Future
Ninja Luxe Café Mini Espresso Machine triple espresso
Karen Freeman / Future
Ninja Luxe Café Mini Espresso Machine triple espresso
Karen Freeman / Future

Classic

The Classic drip coffee setting yielded consistently good results. In addition to adjusting the grind size, brew temperature, and strength if you like, you can also choose to brew 6, 8, 10, or 12 ounces of coffee. The user experience of brewing the drip coffee is the same as brewing espresso, except that you skip the tamping step. The machine does something totally different on the inside. You get no crema. And when you go to throw the puck away, it's very wet, as opposed to the drier, crumbly puck you get with espresso.

Ninja Luxe Café Mini Espresso Machine brewing classic drip coffee
Karen Freeman / Future
Ninja Luxe Café Mini Espresso Machine brewing classic drip coffee
Karen Freeman / Future
Ninja Luxe Café Mini Espresso Machine brewing classic drip coffee
Karen Freeman / Future

Rich

The rich drip coffee setting works just like the classic, only it yields a richer brew. I find I prefer the classic, as I found it a bit smoother and less bitter, but your tastes may differ.

Ninja Luxe Café Mini Espresso Machine
Karen Freeman / Future
Ninja Luxe Café Mini Espresso Machine
Karen Freeman / Future

Over ice

The drip coffee over ice setting might have been my favorite. I found it very smooth and it didn't taste too diluted from the ice.

Ninja Luxe Café Mini Espresso Machine coffee over ice
Karen Freeman / Future
Ninja Luxe Café Mini Espresso Machine coffee over ice
Karen Freeman / Future

Steam wand

I found that it took some practice to get the milk frothing just right. I tried just leaving the jug in place and frothing it from there, and it works ok but doesn't produce much foam. I tried following the instructions about angle and movement in the owner's manual, and got too much foam.

The wand will purge itself right after frothing, and you'll want to wipe off the milk from the outside of the wand right away. Otherwise it sticks on there pretty good, requiring a bit of scrubbing to get it off.

Ninja Luxe Café Mini Espresso Machine frother
Karen Freeman / Future
Ninja Luxe Café Mini Espresso Machine frother
Karen Freeman / Future
Ninja Luxe Café Mini Espresso Machine frother
Karen Freeman / Future
Ninja Luxe Café Mini Espresso Machine frother
Karen Freeman / Future
  • Performance score: 3.5/5

Should you buy the Ninja Luxe Café Mini Espresso Machine?

Ninja Luxe Café Mini Espresso Machine score card

Attribute

Notes

Score

Value

While not cheap, it does replace five machines: conical burr grinder, coffee scale, espresso machine, coffee machine, and milk frother.

4/5

Design

It looks great on the counter and has a relatively small footprint for all it does.

4.5/5

Performance

There's definitely a learning curve and my results were not consistent, but the coffee drinks especially were quite tasty and the espresso crema was perfect every time.

3.5/5

Buy it if

You want to be the barista

You'll need to put the effort in, but you can be the barista at home with this machine. You control the settings and the results, with help from the machine's sensors.

You want all the coffee accoutrements in one smallish machine

Forget having a separate grinder, scale, brewer, and frother spread out over your countertop. Just one little machine does it all.

You can't decide between espresso and drip coffee

Now you don't even need two different machines for espresso and drip coffee. The Ninja Luxe Café Mini Espresso Machine does both, plus iced coffee and milk drinks too.

Don't buy it if

It's not in your budget

While you'll likely make fewer trips to the coffee shop, and you don't have to buy five separate machines, it's still not cheap.

You don't have great manual dexterity and/or strength

It takes some coordination and muscle to get the portafilter correctly installed in the group head for brewing.

You expect perfectly consistent results with the touch of a button

This machine isn't a fully automatic touch-of-a-button machine. It's not always consistent and there is a learning curve.View Deal

Ninja Luxe Café Mini Espresso Machine: also consider

De'Longhi La Specialista Touch

This one is a little bit more automated and beginner-friendly than the Ninja Luxe Café Mini Espresso Machine while still being pretty small and lightweight. It's also a bit more expensive.

Read our De'Longhi La Specialista Touch review

Ninja AutoBarista Pro Fully Automatic Espresso Machine

While almost double the price of the Ninja Luxe Café Mini, it's worthwhile if you want a one-touch, super easy-to-use machine. It makes about a dozen different beverages including coffee, espresso, iced drinks, and milk drinks.

Read my Ninja AutoBarista Pro Fully Automatic Espresso Machine reviewView Deal

Terra Kaffe TK-02

This fully automatic coffee and espresso machine does it all with a touch of a button or even a voice command to Alexa. Custom design your own beverages. It's the priciest of the bunch, but an amazing machine.

Check out my Terra Kaffe TK-02 review.View Deal

How I tested the Ninja Luxe Café Mini Espresso Machine

I brewed and drank every drink on the menu: (double) Espresso, Triple (espresso), Classic (coffee), Rich (coffee), and (coffee) Over Ice more than once. I used two different kinds of beans for each beverage, first going all the way through the menu with a dark french roast and then again with a medium-dark roast. I frothed two different kinds of milk (almond and skim dairy) several times and added the milk to espresso shots. I cleaned all of the parts that touch the coffee after each use.

First reviewed July 2026

Is your home safe this summer? Security tech expert Chris Price shows how to expand a single camera into a budget-friendly home defence setup for when you're away on vacation

Planning a summer getaway but worried about leaving your house for a few weeks? While statistically you are more likely to suffer a break-in during the winter months when it’s much darker, summer also presents an ideal opportunity for burglars. Even if you're at home there are increased risks, especially if you leave your windows open to get some fresh air into the house during a heatwave.

Of course, there are basic steps you can take to reduce your risk such as asking a neighbor to take in your mail and packages, and making sure windows are closed when you go out. But technology can help big time too. What’s more, you don’t have to spend a fortune on all the gear. Whereas once you had to spend thousands on security cameras and PVRs (personal video recorders) that had to be professionally installed, now you can buy cameras and video doorbells for a fraction of the price that can be controlled easily via your smartphone.

Starting simple

The trick is to start simple. A good idea if you are going away for a long time is to have an indoor camera focused on the most vulnerable part of the house where a burglar is most likely to break in — such as a back door. I’ve got a Nest Cam IQ Indoor focused on my patio doors leading out to the garden. I like it because it can record when it hears sound (such as glass breaking) as well as motion.

However, there are other cheaper models available from companies such as Amazon-owned Blink and Ring as well as lesser-known, but popular, Chinese brands such as EZVIZ, Reolink and Aqara.

Focused on the front door I have a tiny Blink Mini 2K+ which also provides a chime for the Blink video doorbell so we can hear it ringing in the house. Usually, I switch the motion sensor off on the Blink Mini during the day because it’s triggered every time a family member opens the front door which can be a bit of a pain. However, when I go on holiday I switch the motion sensor on just in case.

Google Nest Cam on table

I use a Google Nest Cam IQ Indoor, which can record sounds like breaking glass

One important consideration is how footage is stored — either locally on a MicroSD card or in the cloud. Personally, I prefer storing footage locally on an SD card, although the downside is that you will usually have to buy a card separately. The advantage of local storage is that not only is it generally more secure (there have been cases of servers being hacked and private security footage being leaked), it also often works out cheaper in the long term.

That’s because many home security companies will charge you a monthly subscription fee to store all your recorded footage and access advanced AI-driven features such as facial recognition and text descriptions of videos.

While these features may be vaguely useful, especially if you have lots of people coming to the door, for the vast majority it’s probably not worth the monthly fee.

Let’s go outside

Obviously, no discussion of home security is complete without talking about outdoor cameras and video doorbells. Whether it’s summer or winter, these devices are invaluable when it comes to optimizing your home security set-up and helping to prevent burglary.

Choosing the type of outdoor camera you want is largely down to personal choice and the type of property you live in. Generally speaking, outdoor cameras should be mounted reasonably high on your property to give you a better view and to prevent theft.

Close-up of IMOU AOV PT security camera mounted outside summer house

Some security cameras, like the IMOU AOV PT, can pan and tilt to follow potential threats (Image credit: Future)

Many offer a wide viewing angle of between 130 and 180 degrees, while some of the latest models, such as the latest IMOU AOV PT, are pan-and-tilt models that detect and track movement automatically.

Want a security camera to act as a deterrent to an opportunist burglar? Then it’s worth considering a device with a powerful built-in spotlight and loud siren. If there are two things that burglars hate more than anything else, they're excessive noise and light that draws attention to what they are up to. Reolink’s Solar Floodlight Cam covers both bases with twin spotlights either side of the camera and an integrated 110dB siren.

Going solar

Unlike indoor cameras, which usually plug into the mains, powering an outdoor camera is a little more challenging. Although some are designed to plug into the mains via a waterproof housing, most now rely on either disposable/rechargeable batteries and/or solar power. Indeed, solar-powered cameras, such as the Reolink Solar Floodlight Cam mentioned above, have become increasingly popular in the UK particularly as summers have got hotter and panels have become more efficient.

While many of the latest outdoor cameras comprise separate solar panels that need to be mounted separately and plugged into a USB-C socket on the camera, others such as the IMOU Cell 3C come with a solar panel built in. Chinese company Baseus even has an innovative solar-powered camera, the Baseus Security S2, that boasts an innovative rotating solar panel that moves as the sun moves in order to maximize power to the camera.

Baseus Security S2 Outdoor Camera 4K mounted outside

Solar panels can dramatically extend the battery life of security cameras, and the Baseus Security S2 has an innovative one that rotates throughout the day to follow the sun (Image credit: Chris Price)

Deciding how to power your outdoor camera isn’t the only factor you need to consider either. You also need to think about the technology you are going to use to transmit video clips to your phone’s security camera app. While for indoor cameras this is usually WiFi, for outdoor devices getting a connection between the indoor router and outdoor camera can be more challenging — especially over distances of around 30m.

One option therefore, may be to buy a device that offers dual-connectivity, including Wi-Fi and cellular (usually 4G), such as the IMOU AOV PT or Eufy 4G LTE Cam S330.

Optimizing your setup

So you’ve got your outdoor camera. What next? Well, now begins the process of optimizing it for your security needs. Generally, most outdoor cameras are far too sensitive and record far more footage than you actually need to look at. As a result, you could find your entire time on holiday viewing footage of someone walking past your house, or a car whizzing by, instead of enjoying quality time away.

Not only is this highly annoying, it could really waste battery power — something that's both costly and time-consuming, especially if you have to climb up on a ladder to take the device down to recharge or change the batteries every couple of weeks.

By reducing video quality you will be able to store more footage on the SD card/in the cloud

Chris Price

Within the app, it’s therefore a good idea to set the motion detection zones so that the camera only records footage captured on your property and also reduce the sensitivity settings too so the camera isn’t recording too much footage. If you know you are going to be away for a set period of time then it’s probably a good idea to ensure the camera can detect motion 24/7, but when you are home you may want to use the menus so it only records at time of the day when you know family members or flat mates aren’t going to be entering or leaving the property (such as night time).

When it comes to video quality, most outdoor cameras now offer at least 1080p video quality. However, some such as the Baseus Security S2 and the Reolink Altas PT Ultra, offer stunning 4K picture quality. While this is great, especially if you want to zoom in on close ups of a potential suspect, most of the time it’s probably unnecessary. By reducing video quality you will be able to store more footage on the SD card/in the cloud and not consume as much power either.

Footage from Reolink Altas PT Ultra camera on an iPhone screen

Many modern security cameras, such as the Reolink Altas PT Ultra, can record in 4K, but dialling down the quality means you'll be able to store more video footage when you're away (Image credit: Chris Price)

For night-time monitoring, standard infra-red (IR) night vision provides clear monochrome visibility in total darkness while a colour night-vision option uses advanced low-light sensors or built-in LED spotlights to capture colour details after dark.

Video doorbells — it’s good to talk

Think someone may be intruding on your property while you’re not around? All security cameras that I’ve ever tested (probably over 50 now) feature two-way audio so you can, if you so wish, talk directly to the intruder to tell him or her to get off your land. And they can also talk back to you, of course, using the built-in microphone.

Video doorbells [let] you speak directly to people who press the button, even if you are sitting on beach sipping a strawberry daiquiri

Chris Price

Some of the latest models even generate automated messages or use different voices so the person doesn’t actually know who they are talking to (for example the Aqara G100 indoor/outdoor security camera lets you turn your voice into that of a robot or clown.) It’s a feature that some women and teens in particular might find reassuring, especially if they don’t want a man to think they are at home by themselves — though I can’t help thinking of Kevin McCallister in the film Home Alone.

Essentially video doorbells take the technology one step further by enabling you to speak directly to people who press the button, even if you are sitting on beach sipping a strawberry daiquiri on your summer vacation (as with the G100, Aqara’s G410 Doorbell Camera Hub also allows you to disguise your voice). Invented by Ring’s founder Jamie Siminoff back in 2013, video doorbells have really taken off in the last few years with most home security manufacturers now producing models.

Aqara Doorbell Camera Hub G410 video doorbell

Video doorbells let you see and speak to visitors (welcome or otherwise) when you're away from home via an app, and some can even change your voice for privacy (Image credit: Chris Price)

Usefully, not only do video doorbells enable you to talk to whoever comes to the door as if you were at home, they can also be set up to detect and record nearby movement just like standard outdoor security cameras. The only real difference is that, whereas outdoor security cameras often have a wide viewing angle and wide aspect ratio, video doorbells tend to offer a much squarer field of view — often 1:1 — so you can see whoever is at the door more clearly.

Advanced functionality

For those looking to replace their traditional doorbell, video doorbells are a great solution. With many models, it’s even possible to use existing doorbell wiring to power them, rather than having to rely on disposable or rechargeable batteries. Many come with separate plug-in chimes so you can hear the doorbell clearly inside the house with a choice of customizable ‘ringtones’, ranging from classical music to Christmas carols.

Did you know TechRadar now has membership?

Various tech product cutouts next to the words 'Insider TechRadar Learn More'

(Image credit: Future)

Become a TechRadar Insider by simply clicking 'Join Now' at the top of this page. Have a question? Please email membership@techradar.com

That’s not to say that video doorbells are the perfect security solution for everyone. They’re not. Often, I’ve found there is quite a lag when you are talking to someone and if you live on a busy street it can be difficult to hear what they are saying. To counter this, some models, including those from Ring, enable you to play automated responses to the visitor, a bit like an old-fashioned answerphone — for example, ‘please leave the parcel outside’ or ‘call back in an hour’s time’.

Another issue is that with subscription services such as Ring Pro you can spend up to $19.99 / £15.99 a month on premium features such as person, package and vehicle alerts, video descriptions and 180 day video playback. At least with a Blink video doorbell it’s possible to store clips on the Blink Sync Module 2 hub using a separate USB drive while the TP Link Tapo D235 is one of the few doorbells with integrated MicroSD storage (it also offers free AI smart detection to distinguish between vehicles, pets and people).

Complete security solutions

Looking for a more advanced security solution for when you go away over the summer? Most manufacturers will allow you to view several cameras via their app. However, if you want to put different types of security devices together — such as locks, lights and a burglar alarm — then you will need a more advanced setup.

Ring Alarm supports certified third-party products via the encrypted Z-Wave network

Chris Price

For example, one advantage of the Aqara G410 video doorbell is that it’s actually a fully-fledged smart home hub with a built-in Matter bridge and Thread border router that can be used as part of a smart home ecosystem such as Apple HomeKit, Google Home, Amazon Alexa and Smart Things.

Owned by Amazon, Ring products including cameras, video doorbells and burglar alarms can easily be controlled using Alexa routines with footage viewable via Echo Show devices. Furthermore, Ring Alarm also supports certified third-party products via the encrypted Z-Wave network, including smart locks from Yale, Schlage and Kwikset. This means you can lock/unlock doors, manage guest PIN codes and trigger automated security routines (such as arming the alarm when the door is locked) all inside the Ring app.

Securing your home for summer

With the summer holiday season well and truly upon us, and houses left empty as we down tools for a well needed break, now is the time to think about securing your home. While traditional precautions — such as securing windows, clearing letterboxes and locking away garden tools (including ladders) — remain essential precautions, modern technology can help too.

Protecting your home against burglary needn’t cost the earth either. You can now buy indoor cameras focused on vulnerable parts of the house for less than $70 / £50 while most outdoor cameras and video doorbells cost between $120 / £100 and $250 / £200. And while subscription charges do push up prices, often these aren’t necessary — especially if you can store footage locally on an SD card or USB drive.

Ultimately, combining the latest tech solutions with solid physical security will give you the peace of mind needed for you to truly unwind, ensuring your home remains a well-guarded fortress while you enjoy your break.

Your daily coffee is over 90% water, and tap water could be ruining your best beans — experts explain how to choose the right filter to unlock the full flavor

If you love coffee, you’ll be very aware of the impact of factors like grind size, water temperature, and infusion time, but there’s something else that’s often overlooked. A double espresso is at least 90% water, and the minerals and other substances it contains can have a huge impact on the overall taste.

I’m a big coffee-drinker (which is just as well, since I test over a dozen coffee makers every year for TechRadar), and I’m planning to buy a water filter to take my brewing to the next level — but what should I look for — and what should you consider if you’re thinking of taking the plunge into filtered water too?

To find out, I spoke to Andy McPhilbin, Head of Aquaphor Professional for UK and Ireland, and Genevieve Upton, beverage industry expert and Head of Water Filtration at Our Taap.

Why does water matter?

“Water quality can have a considerable impact on how coffee tastes, with chlorine, mineral composition, alkalinity and pH all influencing the final flavour profile,” says Upton.

“Most tap water supplied to UK homes is disinfected using chlorine-based compounds. Residual chlorine can react with components in coffee and tea, contributing bitter, medicinal or chemical notes that may overwhelm the more delicate characteristics of the coffee. Boiling water can reduce the levels of chlorine, though it can also create other unwanted flavours, such as by reacting to a plastic kettle.”

Did you know TechRadar now has membership?

Various tech product cutouts next to the words 'Insider TechRadar Learn More'

(Image credit: Future)

Become a TechRadar Insider by simply clicking 'Join Now' at the top of this page. Have a question? Please email membership@techradar.com

She explains that the mineral composition and pH of the water also play an important role when it comes to how your coffee tastes.

“Slight differences in acidity, together with the concentrations of minerals and buffering compounds, influence extraction efficiency and the balance of flavors in the final cup. As water companies vary their supply sources throughout the year, you might notice that the same beans, brewed in exactly the same way, taste different from season to season.”

In fact, using unfiltered water doesn’t just mean your coffee tastes sub-optimal - it could cause your expensive coffee machine to break down — and it won’t be covered by the manufacturer's warranty..

“The warranty only covers manufacturing defects, and unfortunately, hard water is not a manufacturing defect,” explains McPhilbin. “So you can turn something that is a very efficient espresso machine into something very inefficient within a matter of weeks. You get a millimeter of scale forming within a matter of six weeks.

“Now, is that important? It is, because you want the life of the machine to be good, but also you've got little injectors which put the right amount of water into that espresso. If they're blocked, you're not going to get the right amount of water. You're going to have the wrong taste. It's got to be precise.”

What types of filtration are there?

Our Taap specializes in home water filtration Its latest system is the Our Taap Home Water System II — a countertop unit that connects to your mains water supply, and uses a triple filtration system with UV purification to remove contaminants while retaining minerals.

Aquaphor makes water filters for commercial and home use, including under-sink systems, pitchers, and even water bottles. Its most advanced systems for home users are the RO-101, RO-102, and RO-202, all of which use reverse osmosis (RO).

This involves forcing water through a semi-permeable membrane that removes chlorine, bacteria, viruses, pesticides, and microplastics. Standard RO filters also strip out minerals, but Aquaphor’s systems can optimize the concentration of calcium and magnesium so they’re just right for coffee — something McPhilbin says “really is a science”.

Reverse osmosis water filter system under kitchen sink

Under-counter reverse osmosis systems can be a good choice if you need a large volume of filtered water (Image credit: Getty Images, onurdongel)

“The mineral content is measured in TDS [total dissolvable solids], and we want that TDS to be somewhere in the realms of between 80 and 120 [parts per million],” he explains. “We have a couple of ways in which we do it, but generally we can either feed more minerals in it by making it tuneable, or we can take them out as well by turning it the other way. But if you have too little, you can cause corrosion, and if we have too much, we're going to get limescale. So we try to hit that sweet spot, which is 100 parts per million in the middle there.”

Our Taap’s filters use granular activated carbon filtration, which Upton says “is particularly good at removing chlorine and some of its by-products, which can mask the more delicate flavour notes in coffee.”

the water has a cleaner, more neutral taste, allowing the natural characteristic of the coffee beans to come through

Genevieve Upton, Our Taap

“By reducing these compounds, the water has a cleaner, more neutral taste, allowing the natural characteristic of the coffee beans to come through. Whether you’re brewing with a cafetière, pour-over or espresso machine, using filtered water can help create a smoother, more balanced cup with greater flavour clarity.

"It's worth remembering, however, that activated carbon filters are designed primarily to remove chlorine and certain organic compounds rather than minerals,” she adds. “As a result, they have little effect on the calcium, magnesium and bicarbonate levels that influence water hardness, alkalinity and extraction.”

Under-sink or countertop?

So which type of filter is right for you? Do you need an under-sink reverse-osmosis system, or would a countertop filter be better? McPhilbin says the decision will mostly depend on how much filtered water you need.

“I think it's down to capacity more than anything,” he says. “Our jug filters have twice the capacity of the competition because we use a unique media called Aqualen, which is a patented media based on ionic exchange and carbon, so you're getting a dual-purpose piece of filtering equipment there. Reverse osmosis has a massive capacity, and [the filter] is not something [you’re] changing all the time.”

Person's hand dipping water-testing strip in a cup of water beside a kettle

Even if you have soft tap water, your coffee can still benefit from a water filter (Image credit: Getty Images, Henadzi Pechan)

Upton says your choice of filter will also depend on the problem you want to solve.

“If your tap water has a noticeable chlorine taste or smell, a filter with activated carbon is usually the best place to start,” she says. “This technology is available in everything from filter jugs to more advanced under-sink or countertop systems, with plumbed-in options offering great convenience for households that use filtered water regularly.

“If you’re dealing with limescale build-up in kettles or coffee machines, it’s important to choose a filter that specifically reduces water hardness, as not all filtration systems are designed to do this.”

You can turn something that is a very efficient espresso machine into something very inefficient within a matter of weeks

Andy McPhilbin, Aquaphor

I know I live in a hard water area (the limescale in my kettle is proof) but even if your tap water is soft, McPhilbin says a water filter is still a good investment.

“Most of the water in the UK is chlorinated, and that can affect the taste quite a lot,” he says. “And it might be that you've not got enough minerals in it to get the best taste.”

If you’re not sure about the type of water you’re working with, there are online tools that can help you understand its composition.

“The Our Taap Water Confidence Index is a great way to look up your postcode and understand what’s in your local water and how this impacts taste, scent and quality, so you can find the best filter for your needs,” says Upton.

According to the Confidence Index, I’m lucky - my tap water is better than 93% of UK postcodes. However, it is moderately hard (as I expected), with a normal level of chlorine and an elevated level of overall minerals. I’m still deciding exactly which type of filter to choose, but considering these results and my penchant for espresso, I’m leaning towards under-counter reserve osmosis with mineral balancing. What about you?

‘Plug-in batteries are the real game-changer’: I talked to Octopus Energy and Anker about the home energy revolution than could soon be 'bigger than solar' for millions

It's typical, you wait for ages for a home energy revolution and then two come along at once — or at least that's what appears to be happening in the UK.

You've probably heard about the first landmark moment. 'Plug-in solar' hit the headlines last week when the UK government announced that small, solar panel kits that feed electricity directly into your standard home socket can legally go on sale from August 27.

That's a big deal. Plug-in solar means that millions of people who have traditionally been locked out of generating their own clean electricity — renters and flat owners, for example — will be able to join the residential solar party, albeit on a more modest scale.

But not everyone was celebrating wildly with biodegradable confetti. Across the country, energy nerds bemoaned one glaring omission in the government's new legislation — a legal pathway for 'plug-in batteries'.

I think in the next couple of years we will see plug-in batteries really be the transformational scale deployment.

Alex Schoch, Group Director for Flexibility at Octopus Energy

For many, these small home batteries — think a mini Tesla Powerwall that plugs into a standard wall socket — are the "real game-changer", as Octopus Energy and Anker both described them to me. That's because they promise to be even more accessible than plug-in solar and act as a money-saving brain that makes your home an active part of a smarter UK electricity grid.

Bold claims indeed, so I spoke to four of the biggest players in this burgeoning space — Anker, Octopus Energy, EcoFlow and Windfall Energy — along with the UK government to find out when plug-in batteries might be coming, what the drawbacks are and, most importantly, how much you can really expect to save...

When are they coming?

A Windfall Battery plugged into the mains

(Image credit: Windfall Energy)

The main premise of plug-in home batteries, like the Windfall Battery above, is simple — they charge automatically using cheap-rate electricity (usually at night), then discharge that electricity around your home during more expensive peak-rate periods. "Even without solar panels, a plug-in battery delivers meaningful savings through grid arbitrage alone," Anker Solix's EU CEO, Kelvin Cao, tells me. Savings estimates range from between £100-£400 per year, depending on your battery, tariff and usage.

Great, so when exactly will they become legal in the UK? When I asked the Department for Energy Security and Net Zero (DESNZ), the official answer was predictably vague. "We are rolling out plug-in solar, which will be quickest to reach the market — helping to bring bills down for good," a DESNZ spokesperson said.

What is a plug-in battery?

A Windfall Energy plug-in battery plugged into a home wall socket

(Image credit: Windfall Energy)

Plug-in batteries are smart energy storage devices that connect to your home's electrical network through a standard wall socket, without any professional installation. They automatically charge from the grid when electricity is cheap and release energy back into your home during peak-rate hours to cut your energy bills. They can work on their own or alongside solar. While they're not currently legal in the UK, that could potentially change soon.

The DESNZ told me its main focus right now is plug-in solar kits and that plug-in batteries have their own technical and regulatory hurdles, which it's currently investigating. Still, there are hopes that grid-connected batteries that plug into your wall socket could be legalised within the next year.

Several big players are quietly preparing plug-in batteries — which are already available in countries like Germany — for a UK launch. Anker, for example, has built a page for its Solix Solarbank 4 that clearly explains the benefits of plug-in batteries, should they become legalised in the UK. "We are eager to support the rise of the plug-in era in the UK and become part of its evolving energy landscape," Anker Solix's EU CEO, Kelvin Cao, told me.

Octopus Energy also recently announced that its new plug-in Nook Cube battery will go on sale sometime in 2027. More confident on the timescale is Windfall Energy, a London startup that's designed the best-looking piece of home energy kit I've seen for a while, the Windfall Battery.

"I was at a roundtable with a Minister of Parliament about a month ago, and everyone there was pretty much calling for batteries to come hot on the heels of plug-in solar," Windfall Energy's co-founder Rob Hallifax told me.

So when is Windfall expecting to start selling its 2.5 kWh home battery, which has an RRP of £1,200 and had previously been slated to ship in autumn? "Winter is more likely now. We want to time it with the plug-in regulations. It’s looking like the end of this year, early next," he added.

Why now?

A graph showing real changes in gas and electricity prices in the UK

(Image credit: House of Commons Library)

You'll probably have noticed that the UK has been on an energy rollercoaster that can technically be described as 'not fun'.

Back in the late 1990s and early 2000s, inflation-adjusted gas and electricity prices were actually stable or even falling. But there was a huge spike for both in early 2022 and they've never returned to pre-energy crisis levels. Electricity prices are still 13% higher than in January 2020, according to the UK government, and they continue to move in the wrong direction.

It is not merely an additional product, but the step from producing electricity to actively managing it.

Kelvin Cao, Anker SOLIX EU CEO

Plug-in batteries promise to be, if not a cure, then at least a much-needed pain killer for our energy bills headache. They're emerging now because of three things — falling prices for lithium-iron-phosphate (LFP) batteries, the easing of electrical regulations in some regions (Germany created the world's first dedicated plug-in solar product standard in late 2025), and soaring wholesale gas prices that are reflected in the graph above.

As Anker's Kelvin Cao tells me, this has "reshaped how European households think about electricity". Unfortunately, that double-digit increase in energy prices is also "unlikely to come down any time soon". That's why Germany started the trend, and the UK is (hopefully) about to follow.

The Anker Solix Solarbank 4 Pro

(Image credit: Anker)

So how exactly do plug-in batteries save you money? "There’s two parts to the price saving," Windfall Energy's co-founder Rob Hallifax tells me. "The simple one is just the price arbitrage. So if you're paying 10p at night and 30p in the day for electricity per kilowatt hour, then you buy it at 10p, use it when it's 30p, you're saving 20p per kilowatt hour," he says.

That part's pretty simple — with the Windfall Battery, this 'buy low, use when prices skyrocket' approach makes up about £168 of its promised £250 per year savings. But there are also extra savings from getting your plug-in battery really singing in tune with the electricity network.

I think it could be bigger than solar because it’s just so easy.

Rob Hallifax, Windfall Energy co-founder

The UK grid acts a bit like a giant smart thermostat, signaling when the system needs more or less electricity, and the idea is that energy suppliers could follow by telling plug-in home batteries when to charge and discharge. Smaller plug-in batteries would likely be capped at an 800W output (without professional installation), so wouldn't be exporting power to the grid. But they could still play a role in balancing demand.

This makes tariffs the second big factor in the money-saving potential of plug-in batteries — and that's something Octopus Energy has been a UK leader in.

Three Octopus Nook home batteries on a stand at a show

(Image credit: Octopus Energy)

"The energy sector overall has not really embraced the fact that you can just offer different types of products to different types of consumer customer groups," Alex Schoch, Group Director for Flexibility at Octopus Energy, tells me. "Of our eight million customers, 1.2 million are on some kind of smart tariff," he adds.

Octopus Energy told me there could potentially be dedicated plug-in battery tariffs or bolt-ons for existing ones. If you've ever been baffled by choosing the right energy tariff, this could also get simpler thanks to plug-in batteries.

"I equate it to the evolution of mobile phone plans," Octopus Energy's Alex Schoch tells me. "First, they were incredibly generic. Then they got so complicated that Carphone Warehouse came into being just to explain the complexity. And now we’re at a stage where we create hyper-personalised plans based on your needs as a consumer. We’re on that same journey when it comes to energy".

But doesn't this also demand a lot of trust in energy companies? Windfall Energy's Rob Hallifax agrees, but thinks falling bills will ultimately convince consumers. "It's their (consumers'] battery, they're in control of it, but the energy company is controlling it a bit to help them maximize the savings," he says. "The consumer has to trust that the energy company is doing this to save them money, and I think that will come when they see their bills go down," he adds.

What's the catch?

An EcoFlow plug-in battery in an attic plugged into the wall

(Image credit: EcoFlow)

Clearly, plug-in batteries won't be a magic wand for everyone's bills, even if the batteries could be subsidised or even given away for free by the UK government to lower-income households, as the i Paper reported recently (the DESNZ declined to comment on this when I asked).

For most plug-in batteries, the payback period (the time it takes for savings to cover the cost of the battery) is expected to be around 3-4 for years, so not exactly a financial quick fix. The Windfall Battery promises annual savings of £250 (with an RRP of £1,200), while Anker tells me that the larger Solix Solarbank 4 on a dynamic tariff like Octopus Agile could save you just under £400 per year. That battery has no UK price yet, but retails for €1,999 in Europe (around £1,700).

The other concern raised by skeptics is safety. Is allowing potentially millions of households to connect batteries to their electricity networks without professional installation really a good idea? Windfall Energy's Rob Hallifax acknowledges that it's an understandable concern. "People see a battery, and they think of scooters and fires, and there some valid concerns. Obviously, safety is critically important, and just one battery fire would be one too many," he says.

The vast majority of households own a refrigerator to store groceries and extend the shelf life of perishable food. Battery storage brings the same benefits to household energy.

Kelvin Cao, Anker SOLIX EU CEO

"But modern batteries are generally extremely safe,' he adds. "There are some studies out of Germany now where they compare batteries to EVs and other home appliances. One headline is that they’re typically about as safe as a washing machine," he adds. The other common comparison is with fan heaters, which are legal in the UK but carry a higher risk of 'user error' incidents than plug-in batteries.

Still, the added complexities of grid-charging batteries mean some agree with the UK government's top-dipping approach. EcoFlow, one of the biggest global players in home batteries, is among them. "We're aware and completely understand that these things take time," Lorna Wallace-Smith (EcoFlow's Head of UK PR) told me. "The fact that they were able to move forward with at least one step is is great" she added.

But hasn't Germany's rapid adoption of both plug-in solar and home batteries shown it's safe? "I think that's something we should learn from, as well as not fast-track into something without knowing it's absolutely built for UK homes," she added.

Could they outshine solar?

A Windfall Energy battery in front of some shelves

(Image credit: Windfall Energy)

Despite these concerns, it seems clear that plug-in batteries have the potential to eclipse the more complex plug-in solar kits in the UK — and most of the experts I spoke to agreed.

"They are the fundamental great equalizer," says Octopus' Alex Schoch on plug-in batteries. "It’s such an important thing for renters because you can then take it with you to your next place," he adds.

"I think in the next couple of years we will see plug-in batteries really be the transformational scale deployment. I think it has the potential of being a mass market thing even faster than solar," he predicts.

Windfall Energy's Rob Hallifax naturally agrees when comparing plug-in batteries to their solar equivalent. "There are 28 million homes in the UK and about half of them are either rented or flats and small homes. So more people could get them, millions, and there’s also the benefit to the grid and to the system," he says.

There is one other obvious comparison with an accessory that's cheap, easy to use and promises to save you money. "We use air fryers as quite a good example. Four or five years ago they just came from nowhere and suddenly half the country has one," he says.

But wouldn't an 'air fryer' level of popularity also cause a problem for plug-in batteries? After all, a lot of their money-saving potential comes from tapping into today's so-called 'delta' between cheap-rate and peak-rate electricity. If plug-in batteries help to solve the imbalance of today's grid demand — and tariffs are adjusted to reflect that — could that start to diminish their savings potential?

"I think yes and no," says Windfall Energy's Rob Hallifax. "So maybe in 50 years the whole grid will be sort of perfect. I think the fundamental thing is that if you have renewable generation, that's always going to be variable. That's just the nature of the world. And so somewhere in the system, storage has to be part of it," he adds.

Octopus Energy's Alex Schoch agrees that such a change would be a long way off. "In theory, yes." he says in response to my pessimistic scenario. "But I would actually say the length of time here is measured in decades, not in a sub-decade quantum," he adds.

However, he does note that a similar process is already happening. "We've had such an explosion of solar in the UK over the last few years that now during Spring and Summer, a lot of the cheapest wholesale price electricity times are actually late morning, early afternoon, mid afternoon, and no longer overnight," he notes.

Charging ahead

A Windfall Battery in a room plugged into a mains socket

(Image credit: Windfall Energy)

The legalisation of plug-in batteries in the UK appears to be a matter of 'when' not 'if'. As a flat owner in south west London with no roof and only a limited appetite for plug-in solar, I'm right in the target market — and will certainly be interested when that moment comes.

But it also won't be an impulse buy where I snap up the first thing I see Amazon. "The biggest pitfall to avoid is making decision on price alone," says Anker's Kelvin Cao. "Now that plug-in solar has regulatory approval, the UK market will attract a wave of low-cost imports, some of which will be excellent and some of which will not. This will be a similar problem once the plug-in batteries are legalised," he warns.

"A battery that cuts corners on cell quality, protective engineering and compliance with applicable safety standards might look more attractive on its price tag, but it will not deliver the same reliability over the 10 to 15 years that a household should reasonably expect," he adds. In other words, buying cheap could backfire when it comes to savings.

So what exactly should you look for when plug-in batteries are legalised? "As a baseline, consumers should look for durable LFP battery cells, a high cycle life, robust protection against weather and corrosion, and integrated safeguards against electrical and thermal risks," Kelvin Cao says.

"They'll probably also say that the product must be listed on the Energy Networks Association (ENA) Type Test Register to demonstrate that its protection settings meet G98 requirements," adds Windfall Energy's Rob Hallifax.

A real-world view

A laptop screen showing energy savings on Octopus Energy

(Image credit: Octopus Energy / Future)

A large number of early adopters are already getting a taste of the benefits of a battery-only setup. One of those is TechRadar contributor Mark Pickavance, who wrote our EcoFlow Stream Ultra X review (which is well worth a read).

I caught up with him to see how it's going and he continues to be impressed. He told me that his monthly energy costs are down by about £40 a month with his setup (which was installed with the help of an electrician), and you could get most of that from a single Ultra X.

The only problem is that this stuff can get addictive. "I started with the premise of using just a battery, but once you have one the logical progression is solar. However, for people renting, it's the ideal solution, and if you use an Economy 7-like tariff (Octopus Go), you can take a chunk out of your costs," he said.

The arrival of plug-in solar from August could, then, be a good dry run of what to expect when plug-in batteries arrive. The big differences between residential buildings between Germany and the UK could mean plug-in solar doesn't quite take off in the same way in the UK, but Anker's Kelvin Cao remains bullish.

"This is no longer a niche movement. Germany passed one million officially registered plug-in solar systems in 2025, with around 430,000 new systems registered during that year alone," he notes. If plug-in batteries follow a similar pattern in the UK, that could have big consequences for energy bills — and the UK's grid as a whole.

❌